K2 Build Log Part Four: Z Belts and Tensioners
Mar 9, 2022Installing the Z belt
Pick a corner to work on. Take your roll of 12mm belt and unroll it so that you have about 4 feet of belt to work with. Feed the end down through the Z idler:
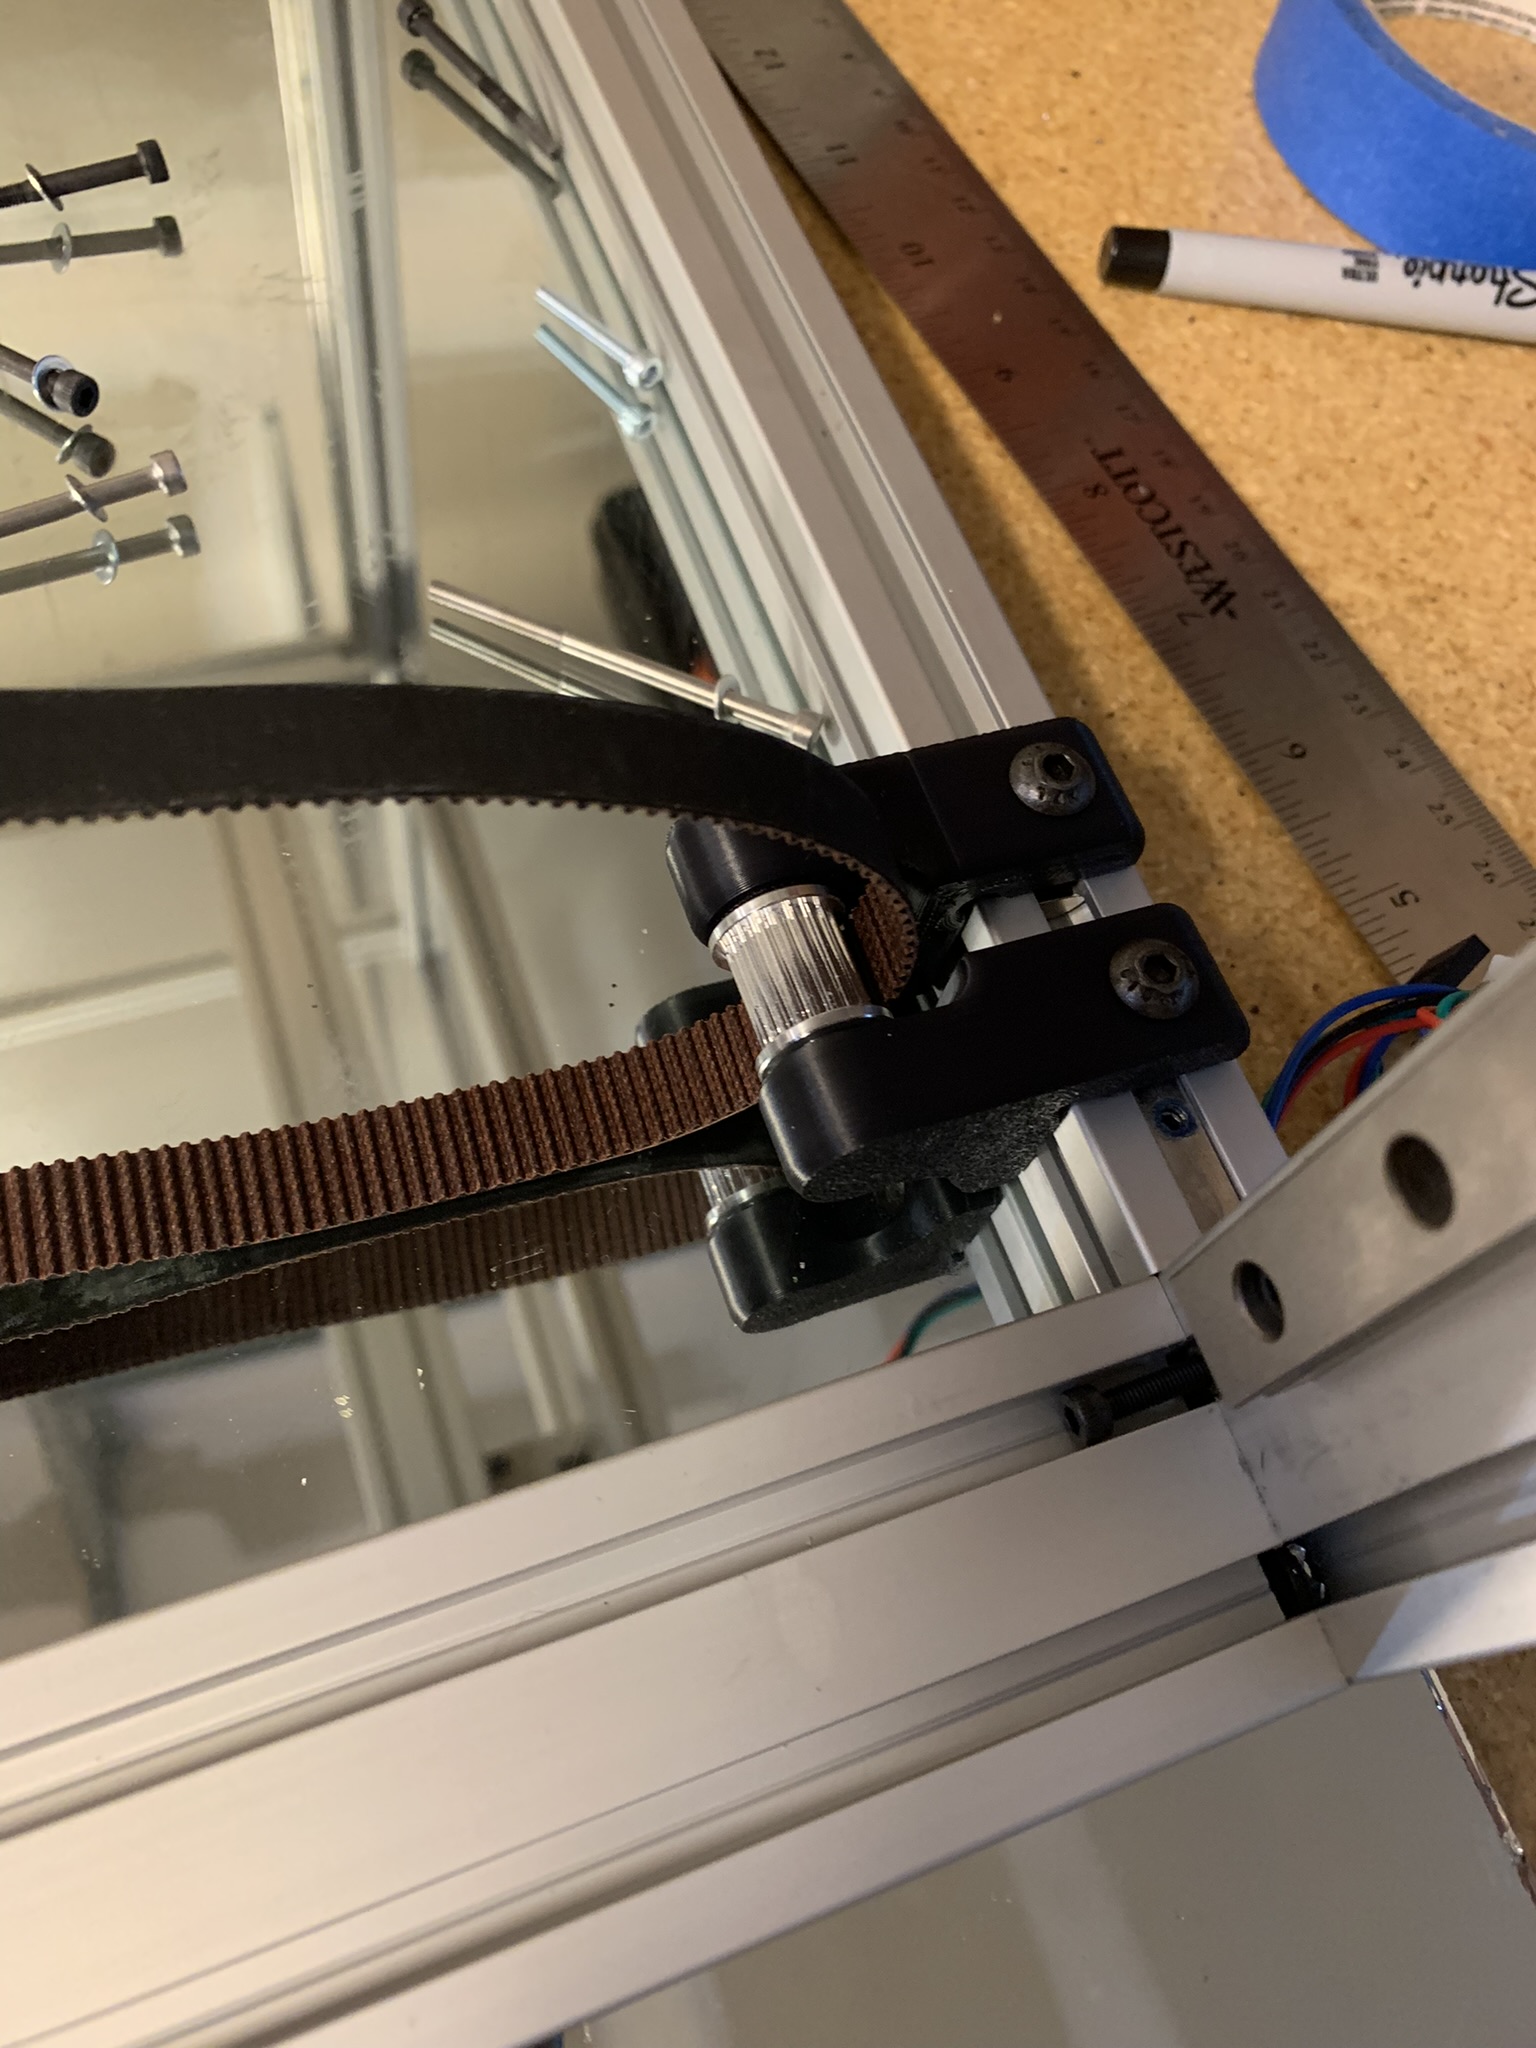
Feed it through the bed lifting part:
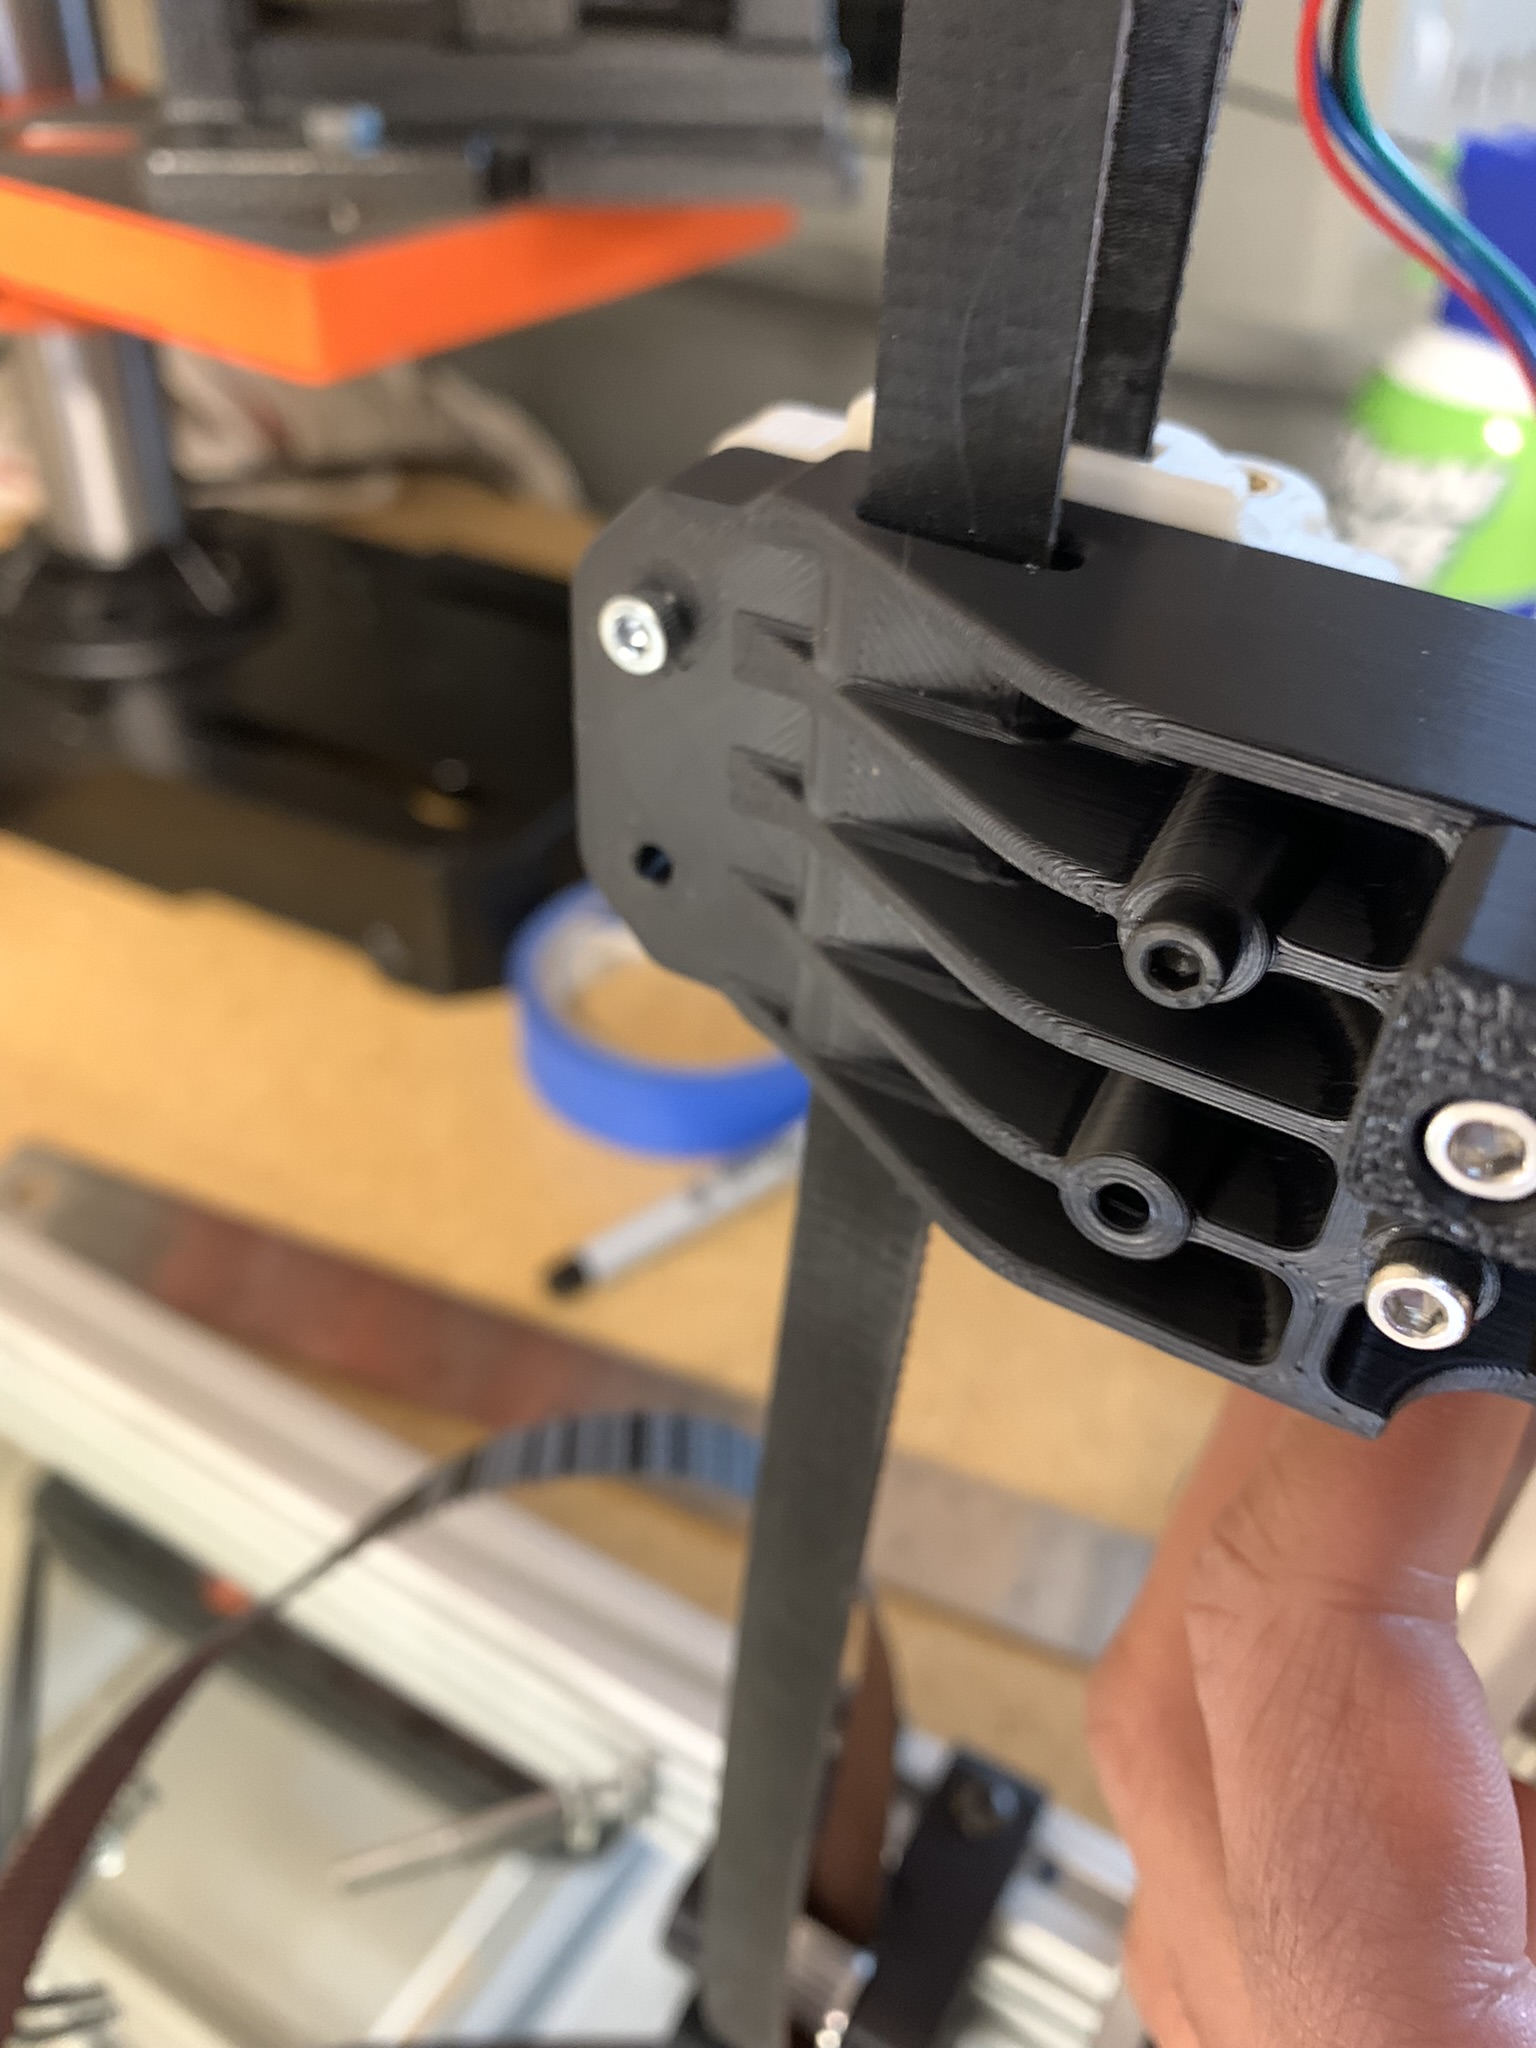
Feed it up through the drive, over the pulley and back down:

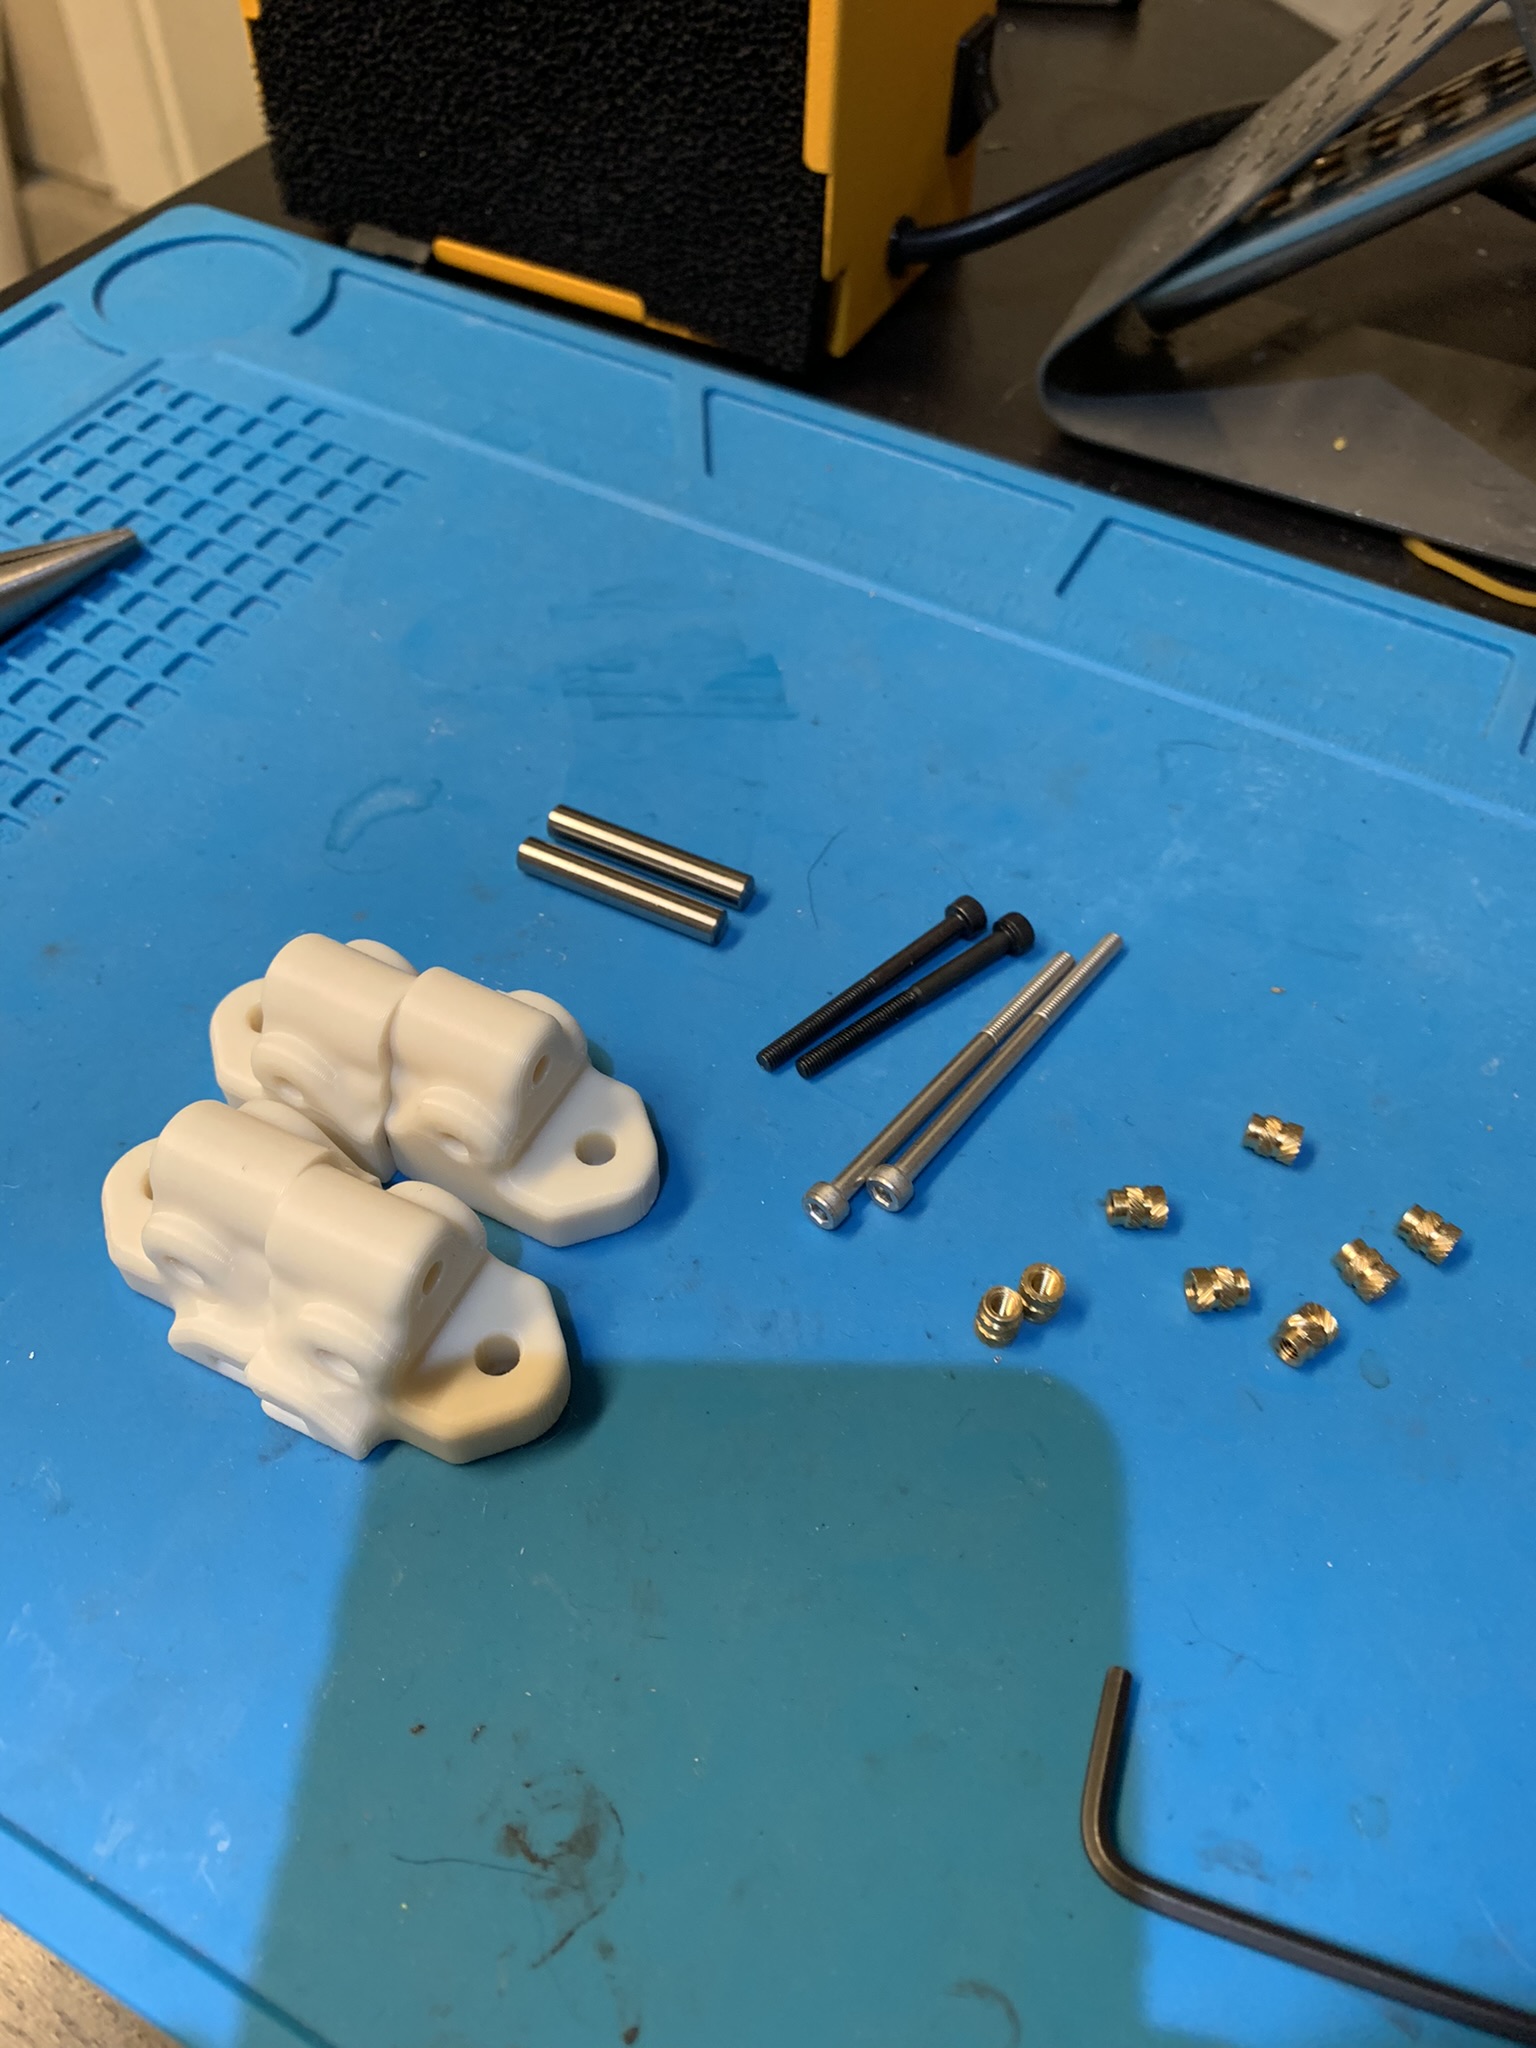
Z tensioner BOM
For each Z tensioner, you will need:
- Printed parts
- 2x 5mm x 30mm steel shafts
- 8x long M3 heatset inserts
- 2x M3x35 SHCS
- 2x M3x50 SHCS
- 4x M3 washers
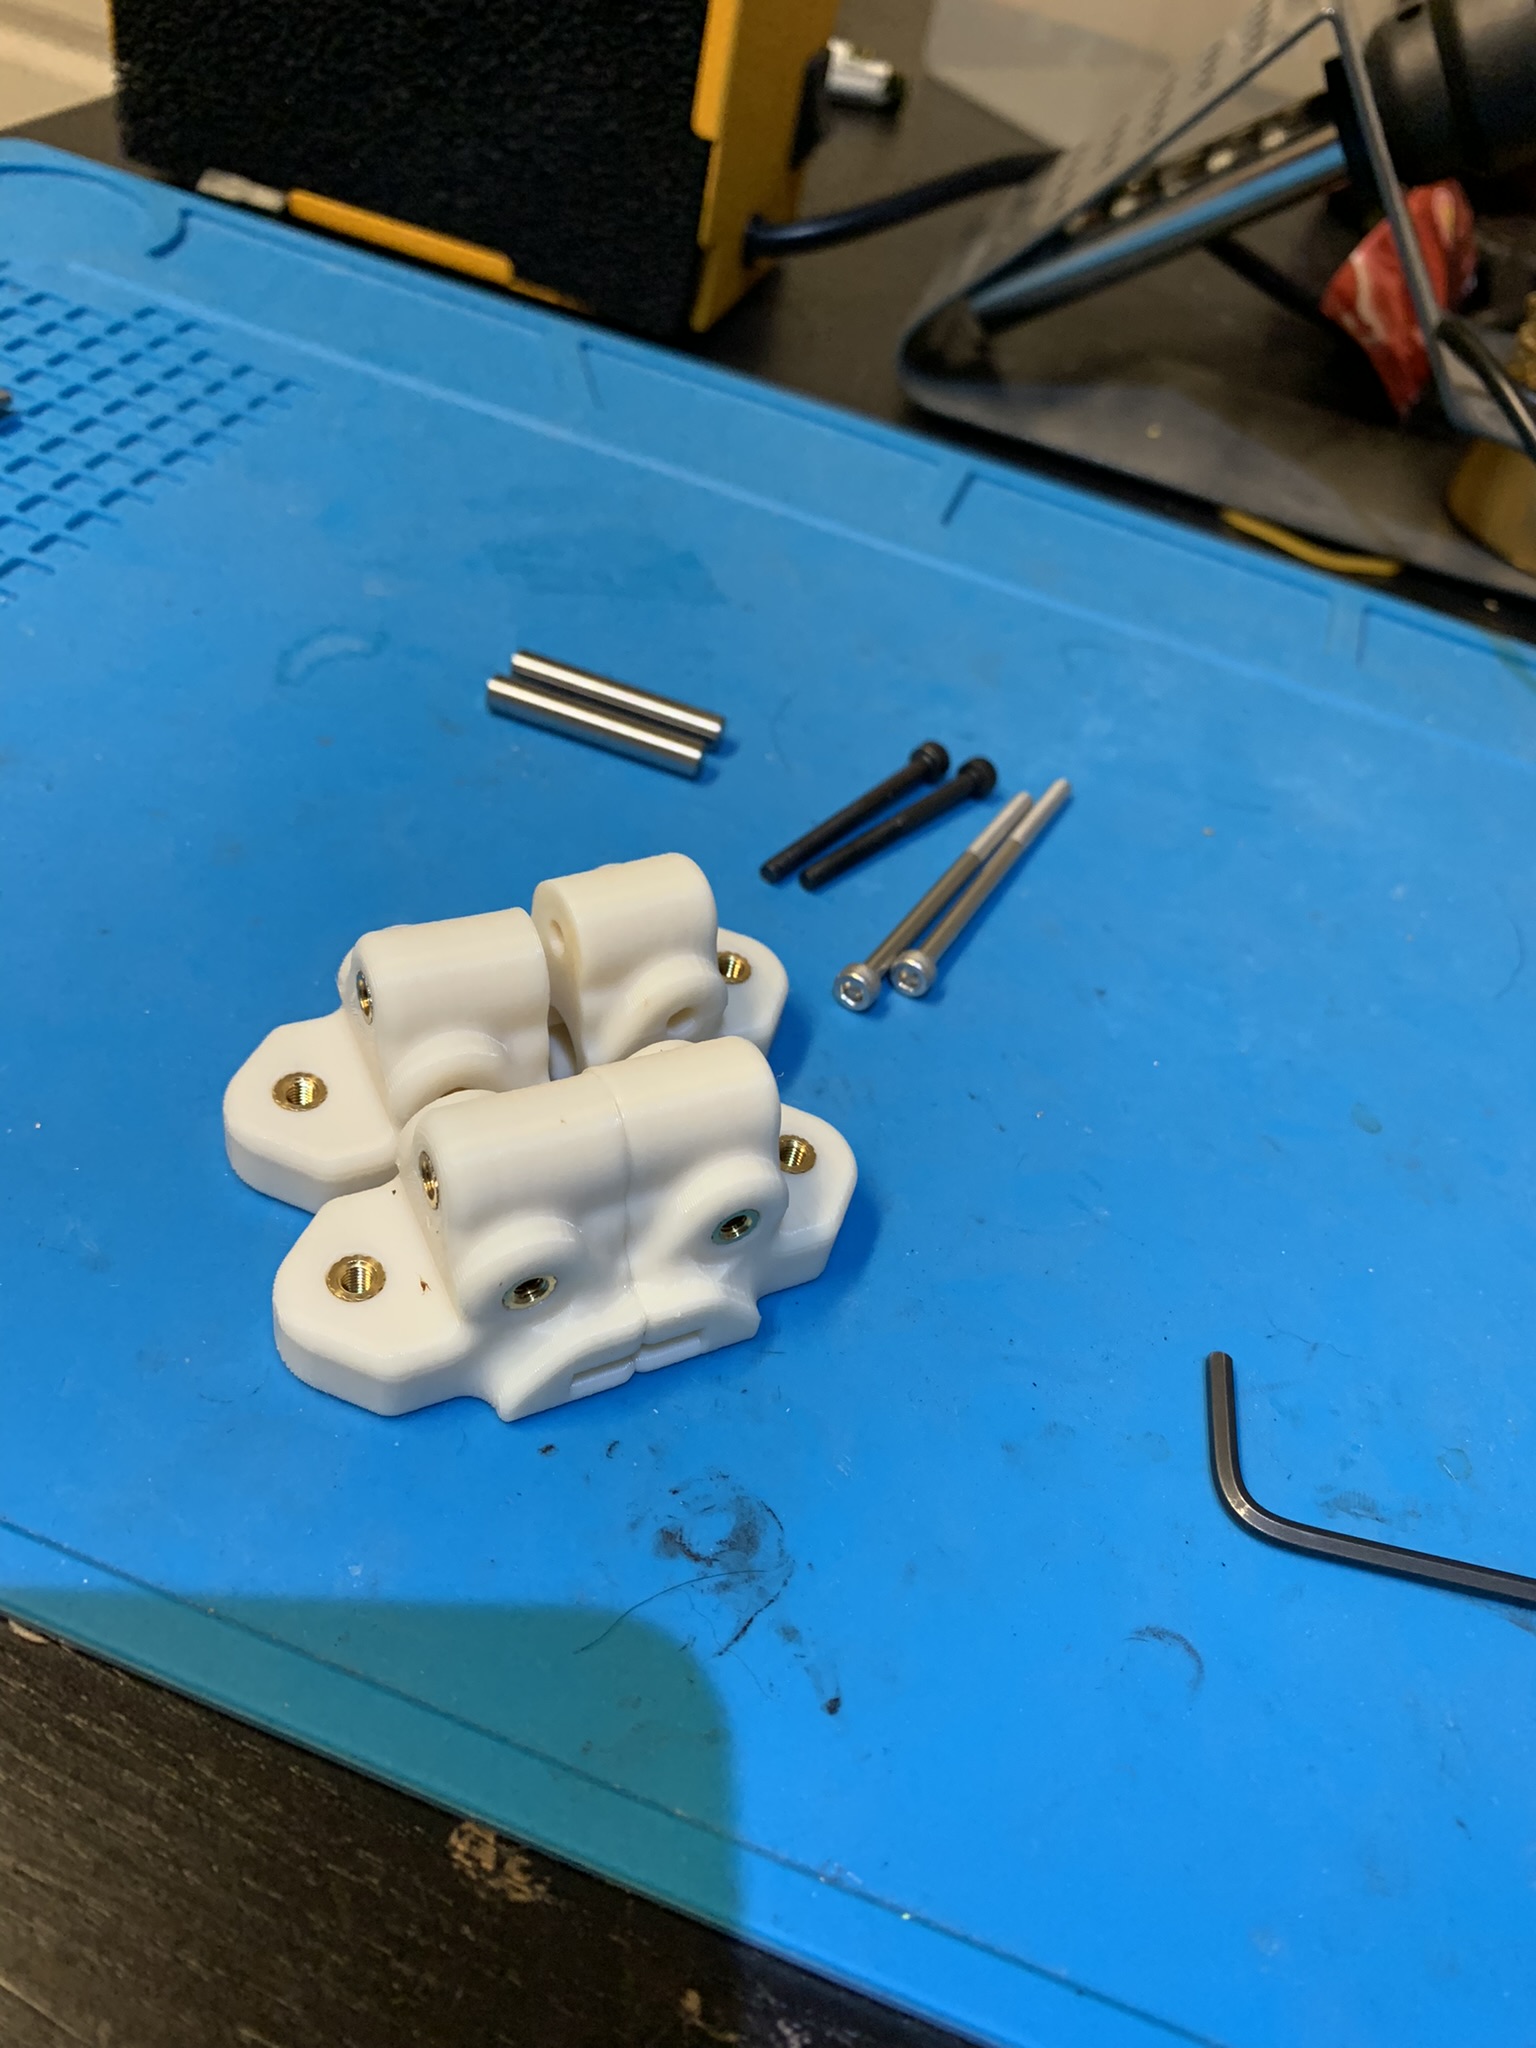
Refer to the eDrawing to figure out which printed parts you need. Look closely, because they all look pretty similar. The important thing to note is that the two parts comprising the upper half should have larger holes for heatset inserts and the two parts comprising the smaller half should have smaller holes. Similarly, the side that will face the Z rails should have larger holes for heatset inserts and the other side should not. The slots for the top and bottom halves should face away from each other.
Installing the Z tensioner
Note - Don’t use loctite on any bolts at this stage.
Insert the heatset inserts into the printed parts.
Try a test fit for the upper and lower halves by inserting a steel shaft to connect the left and right parts of each half together. If the two parts don’t sit almost flush against each other, move the shalf around and wipe off any pieces of filament that come out.
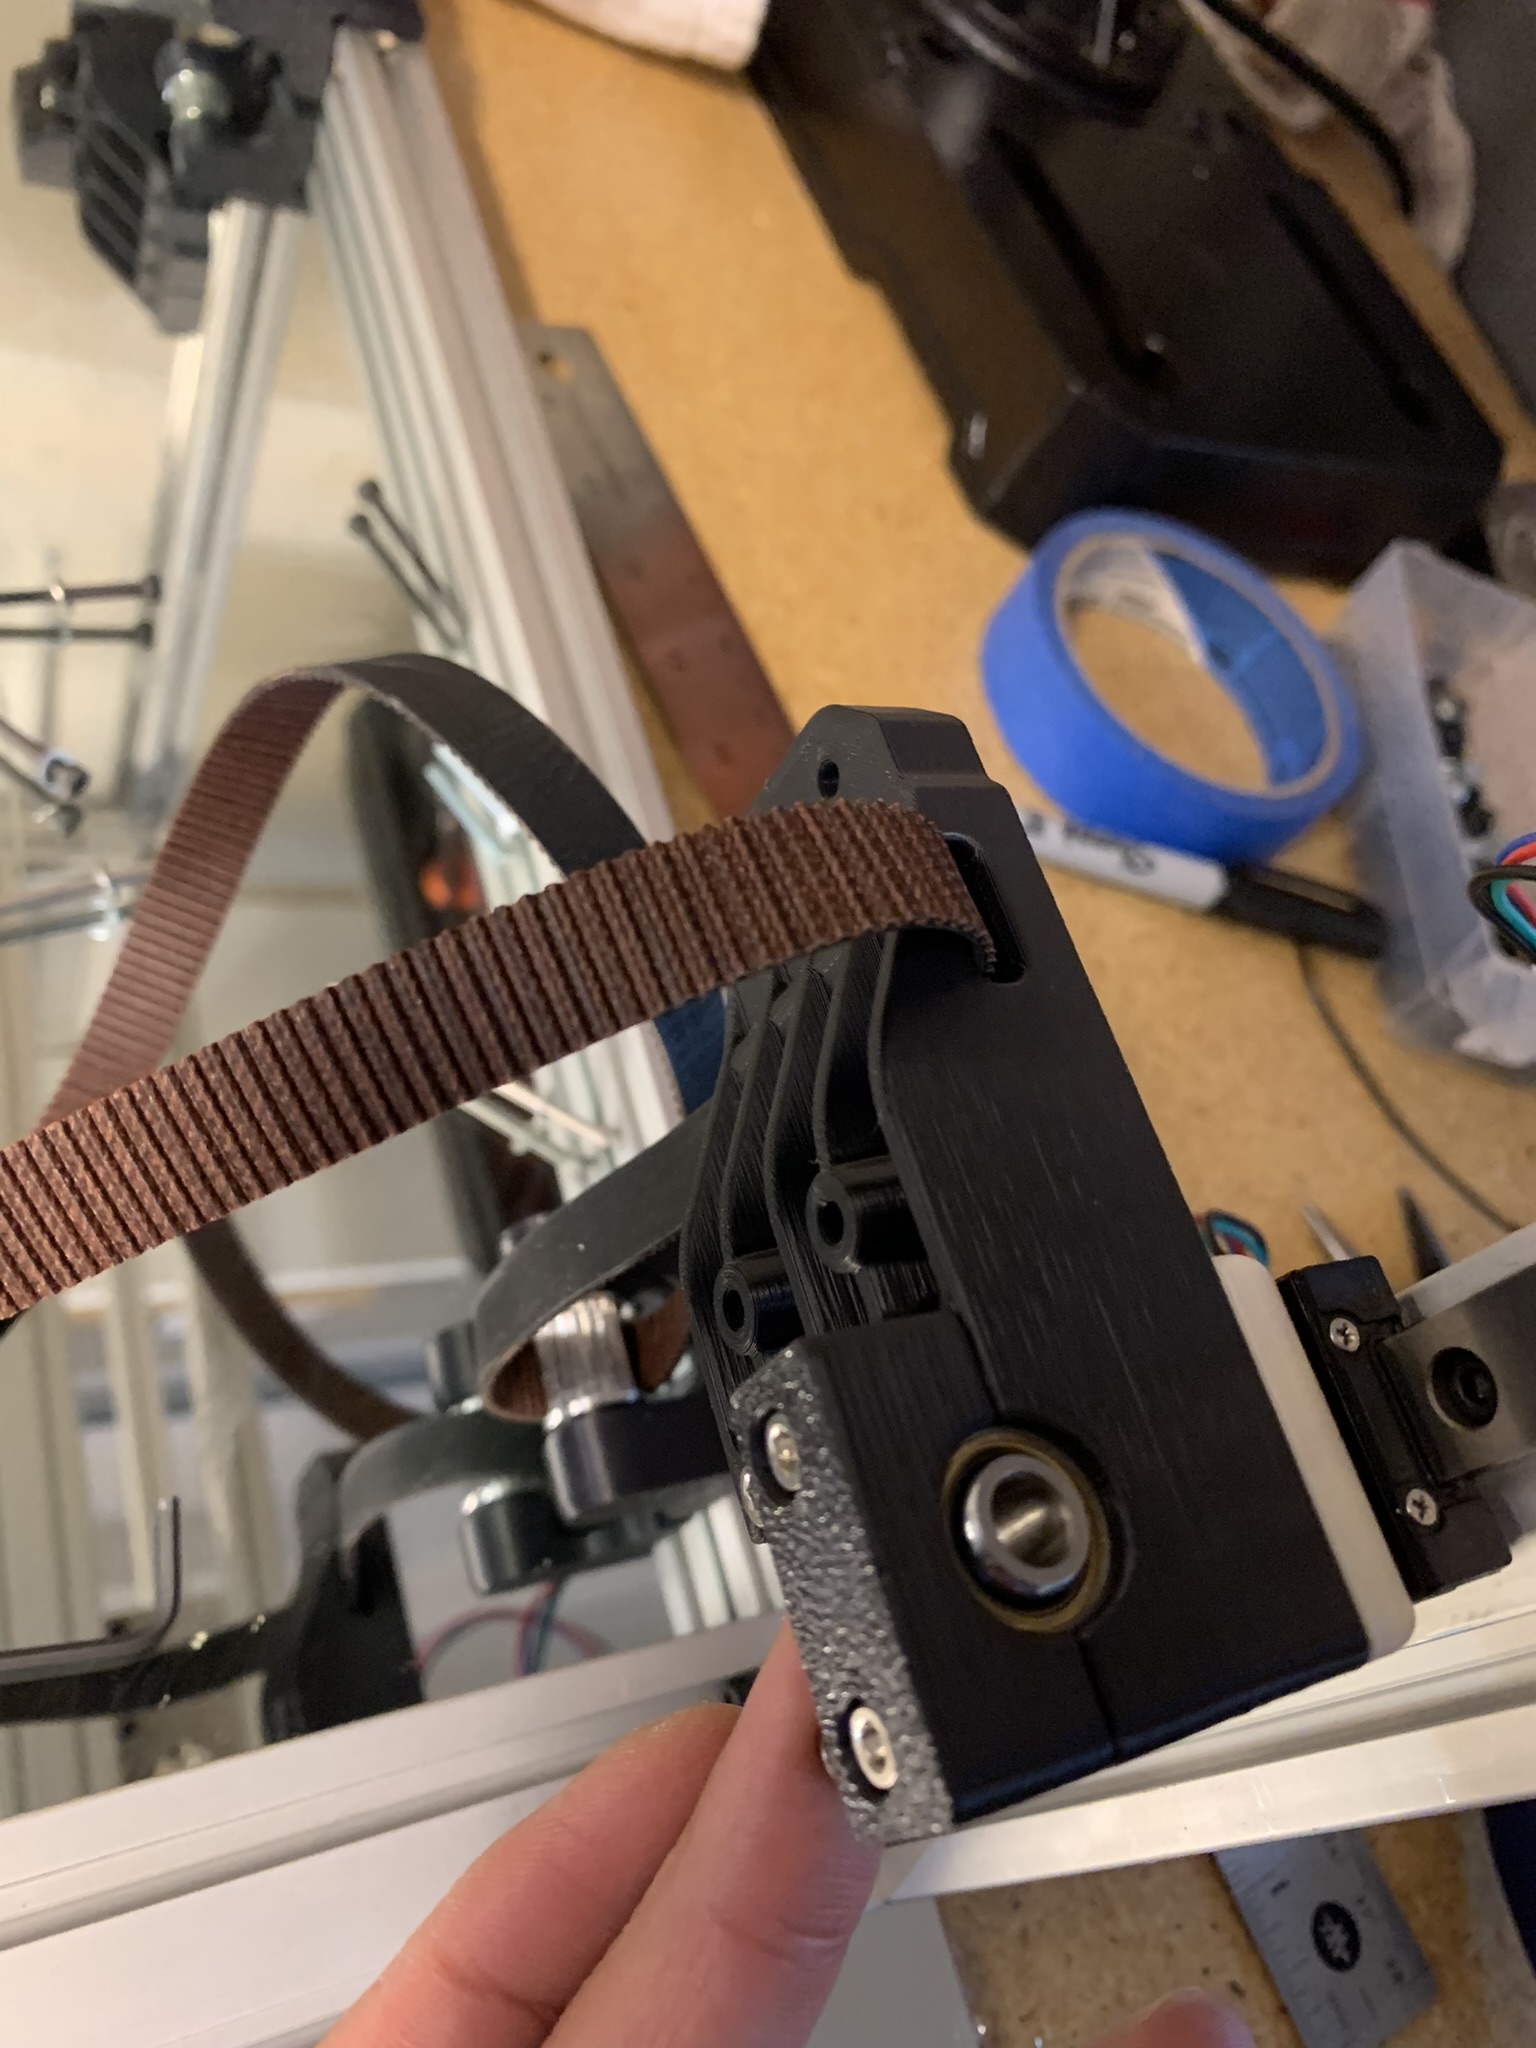
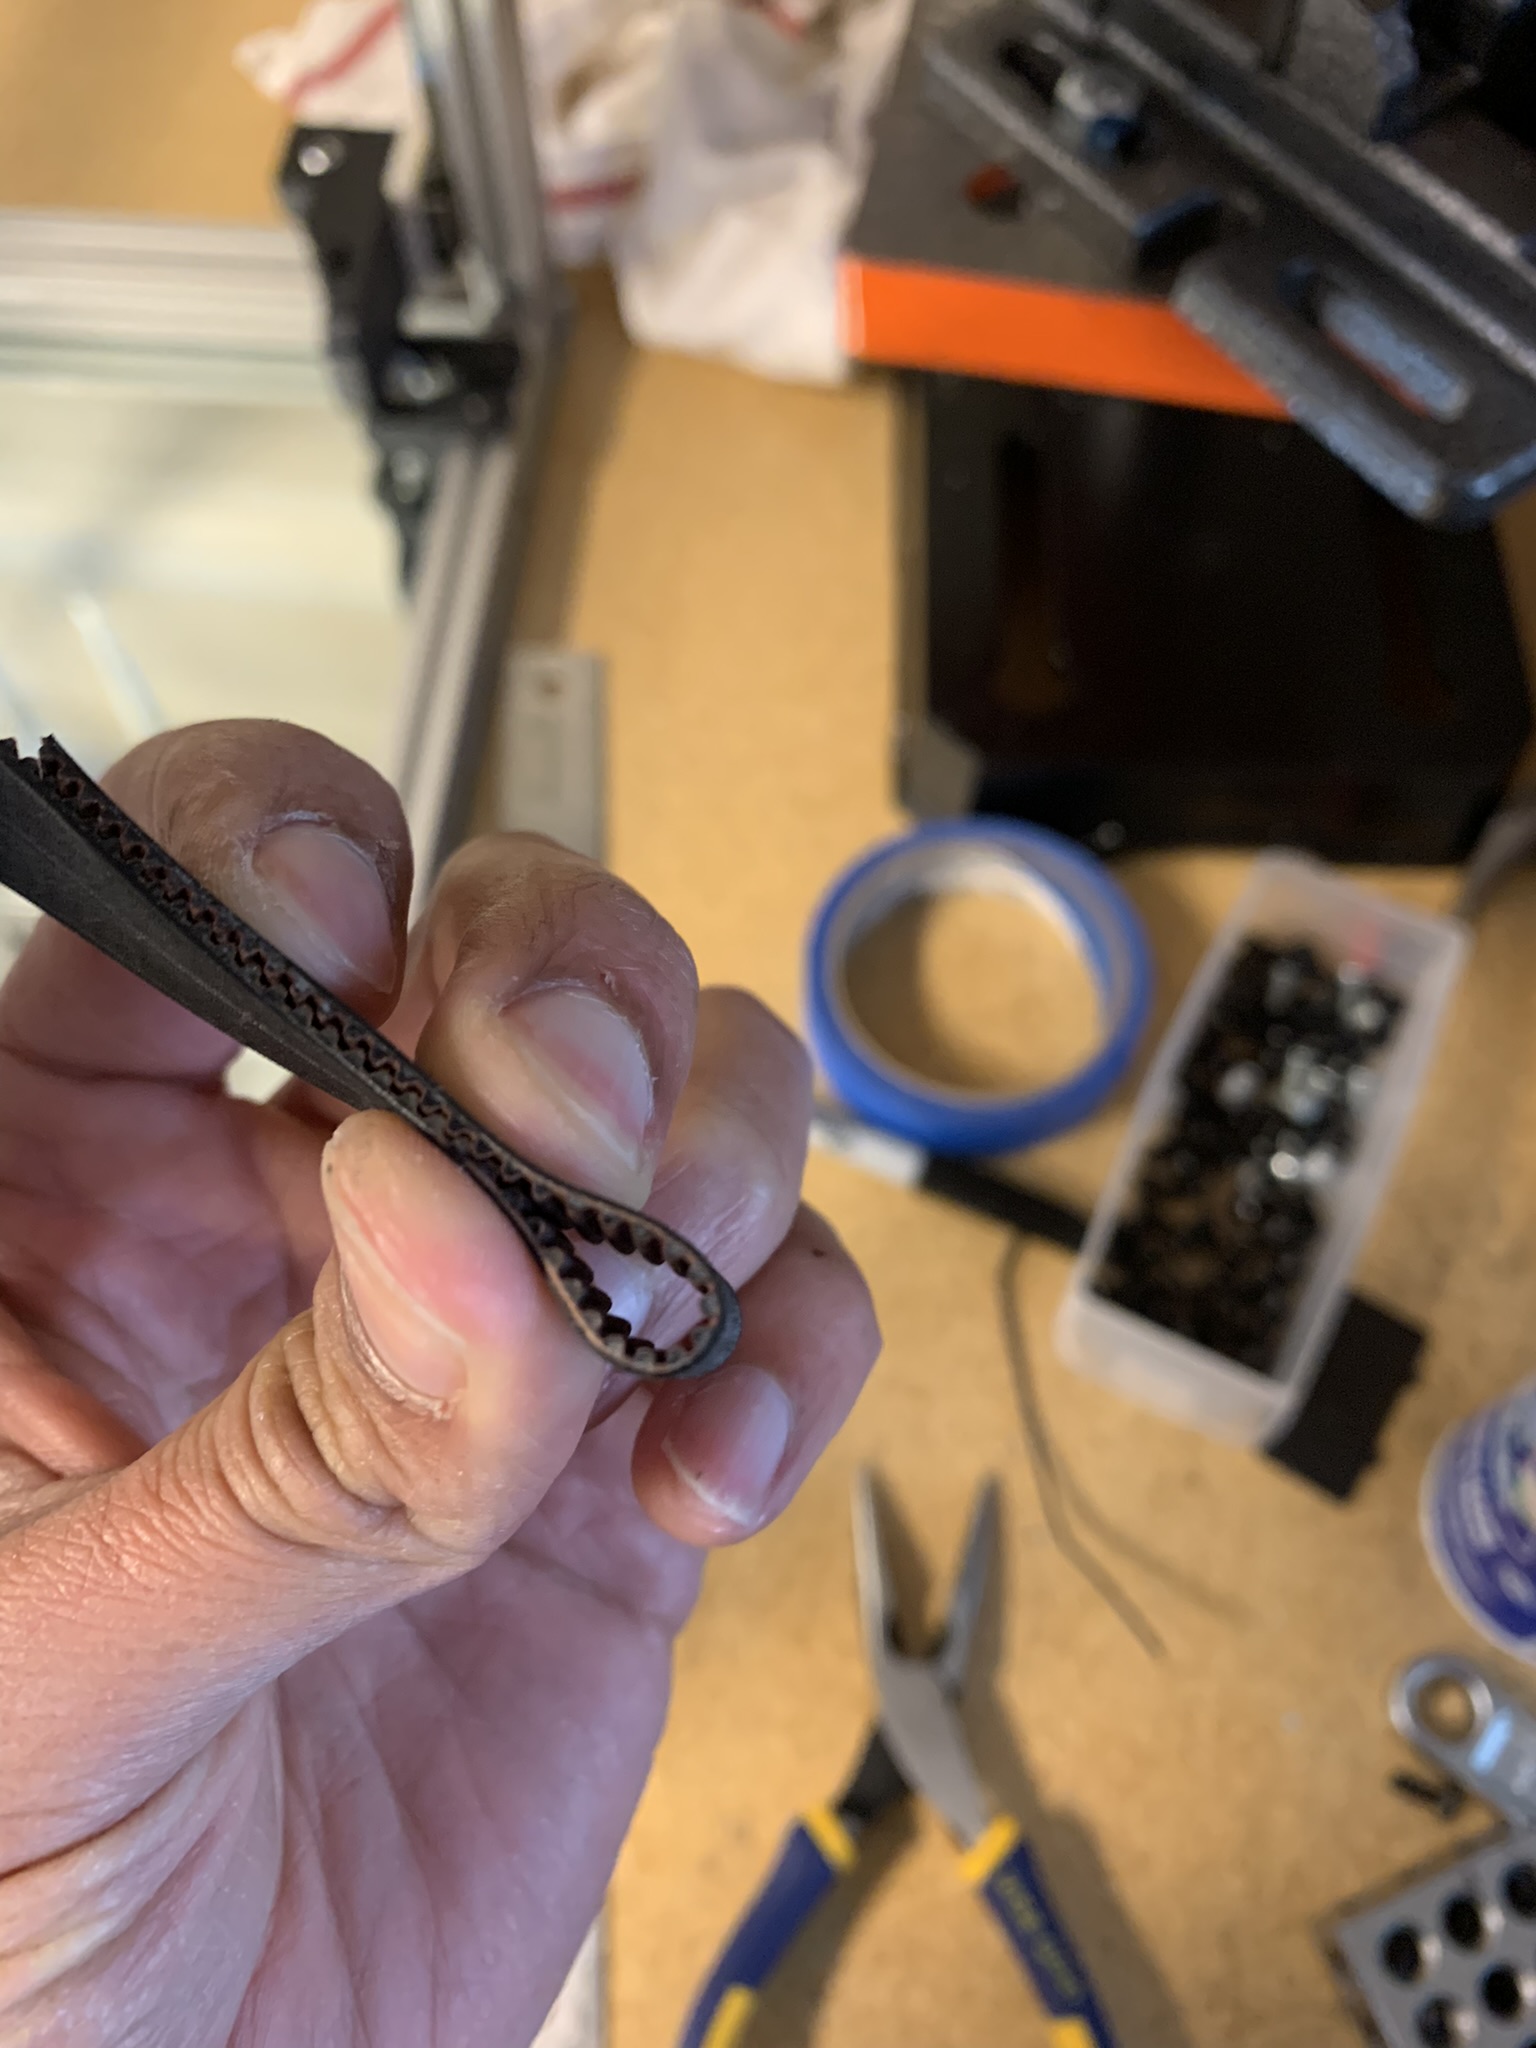
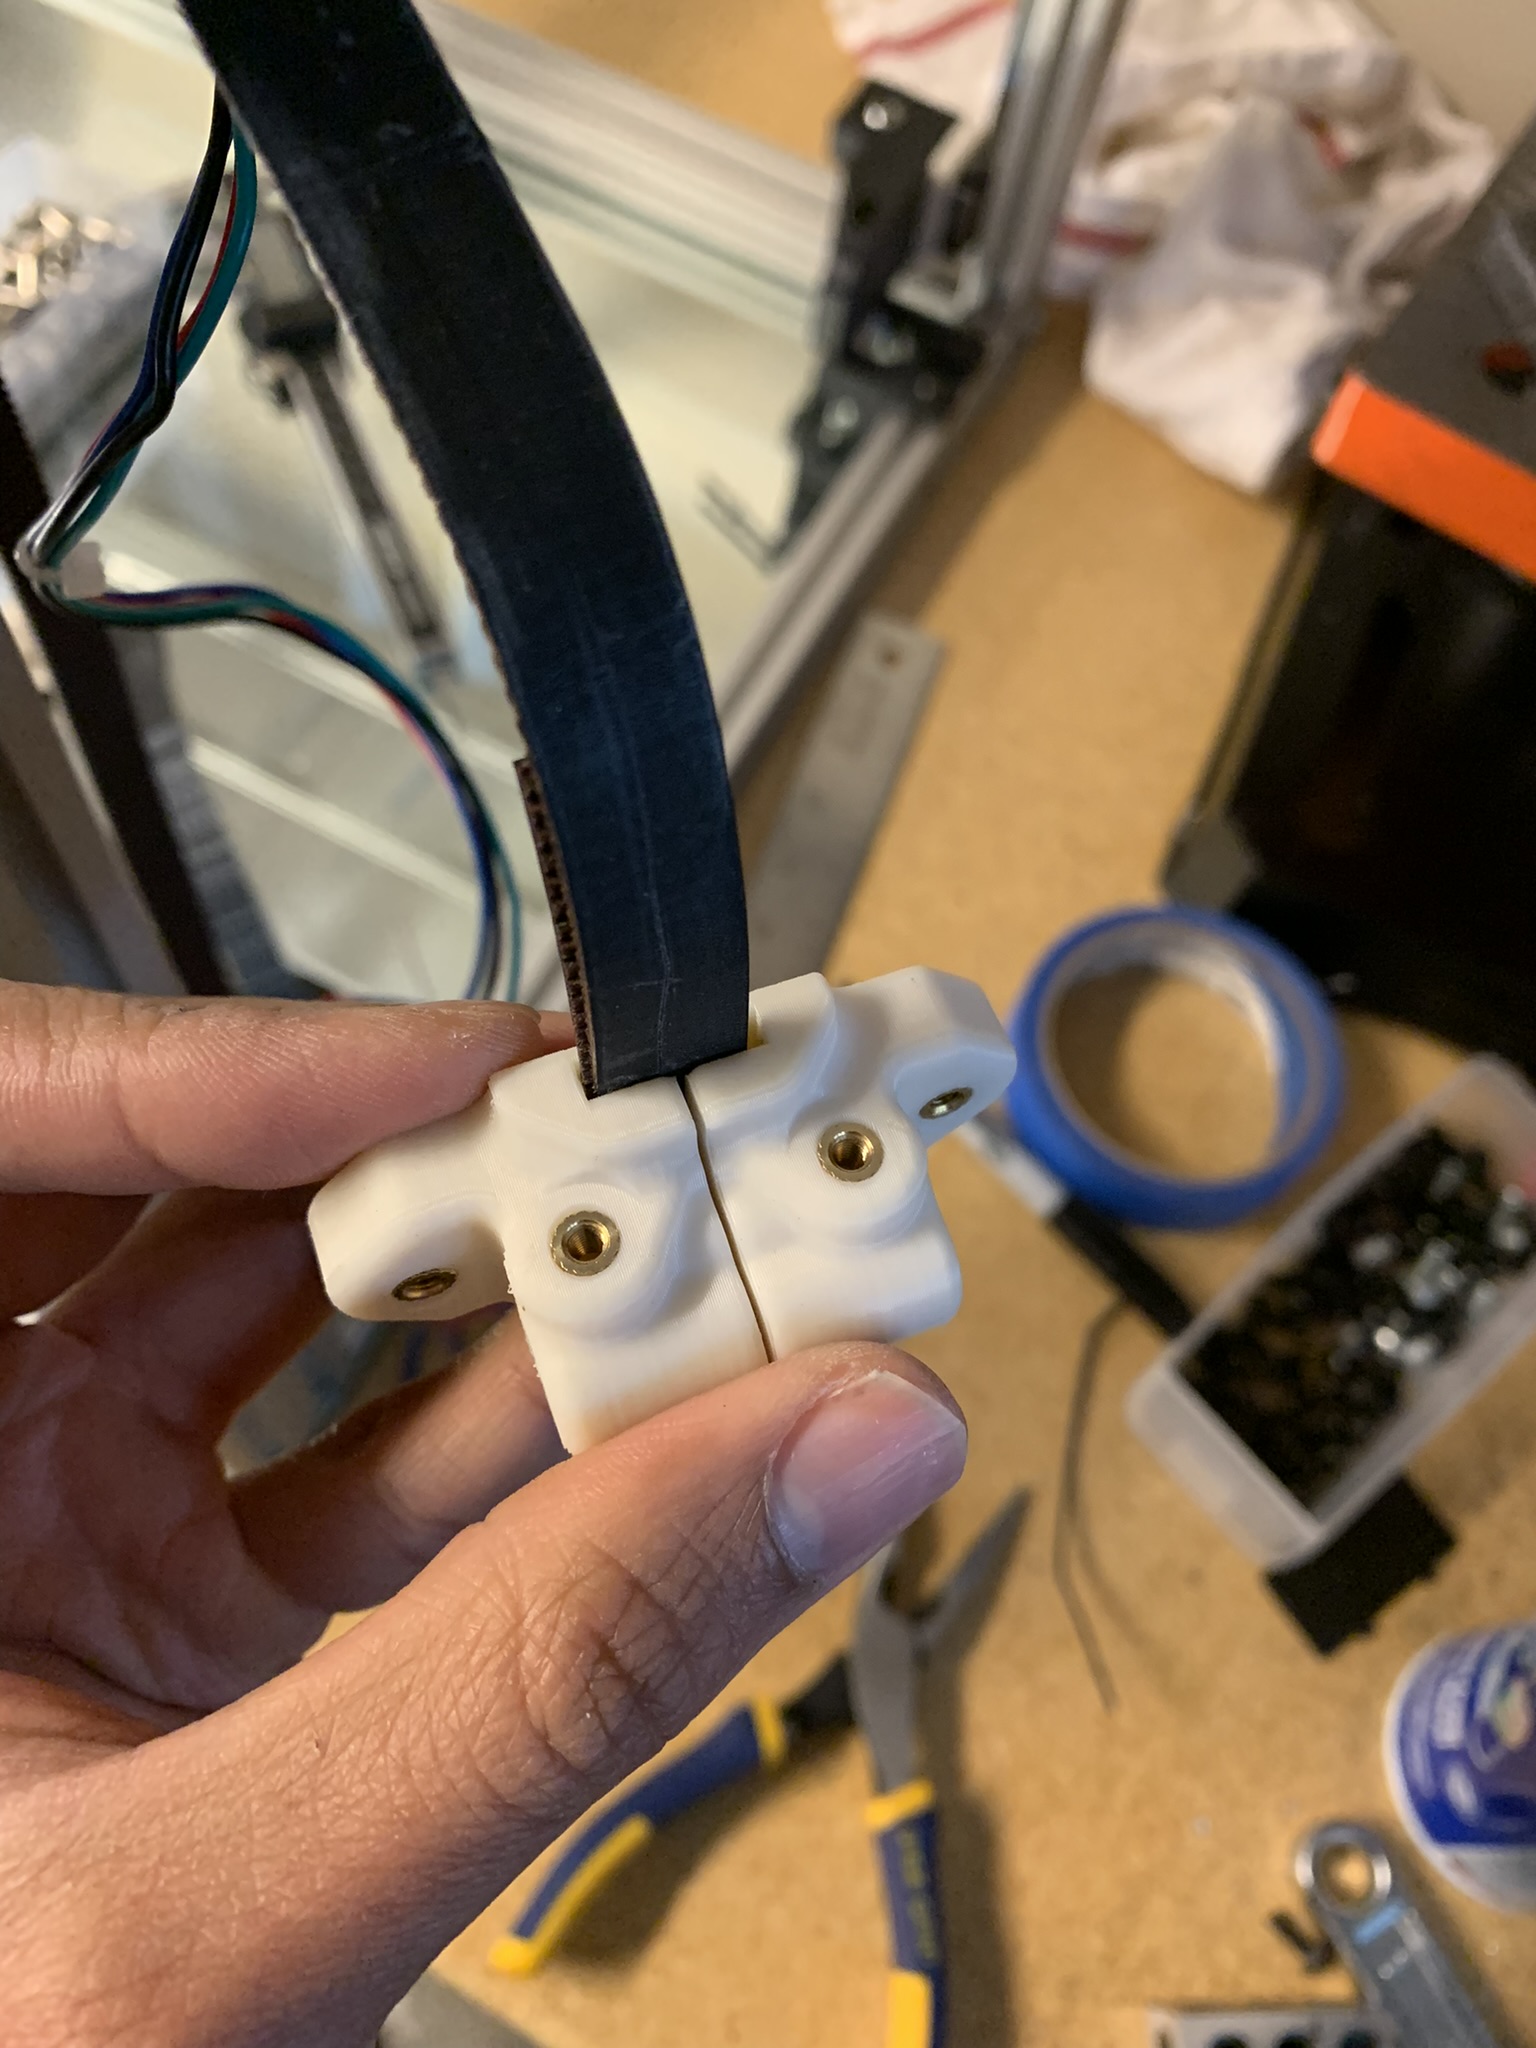
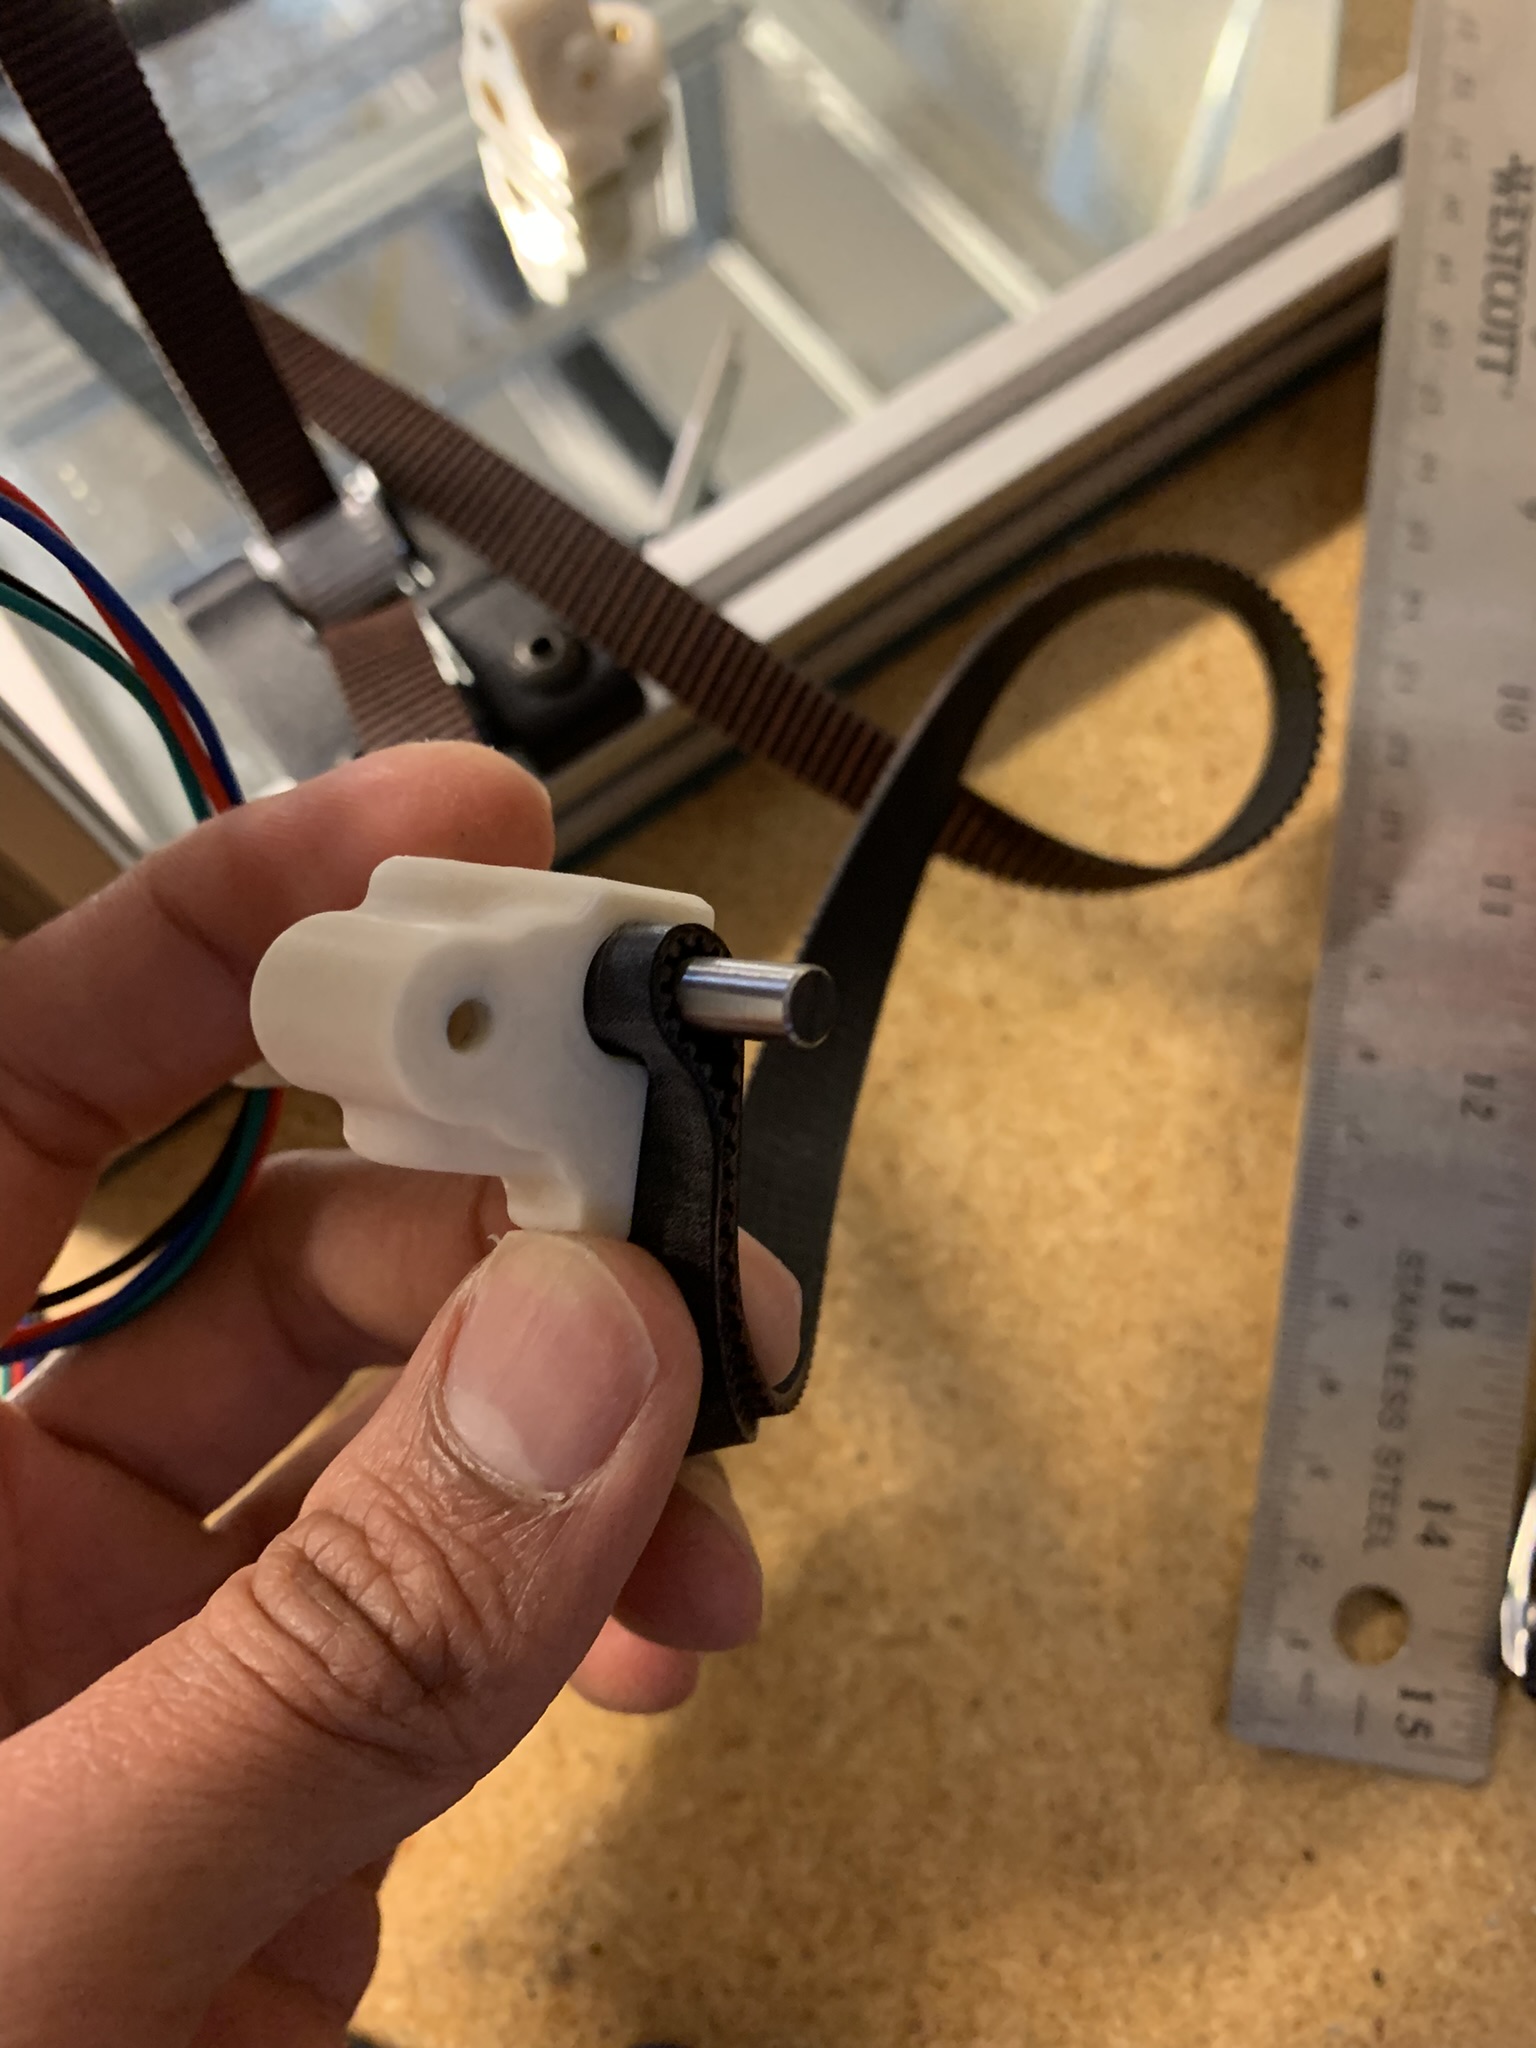
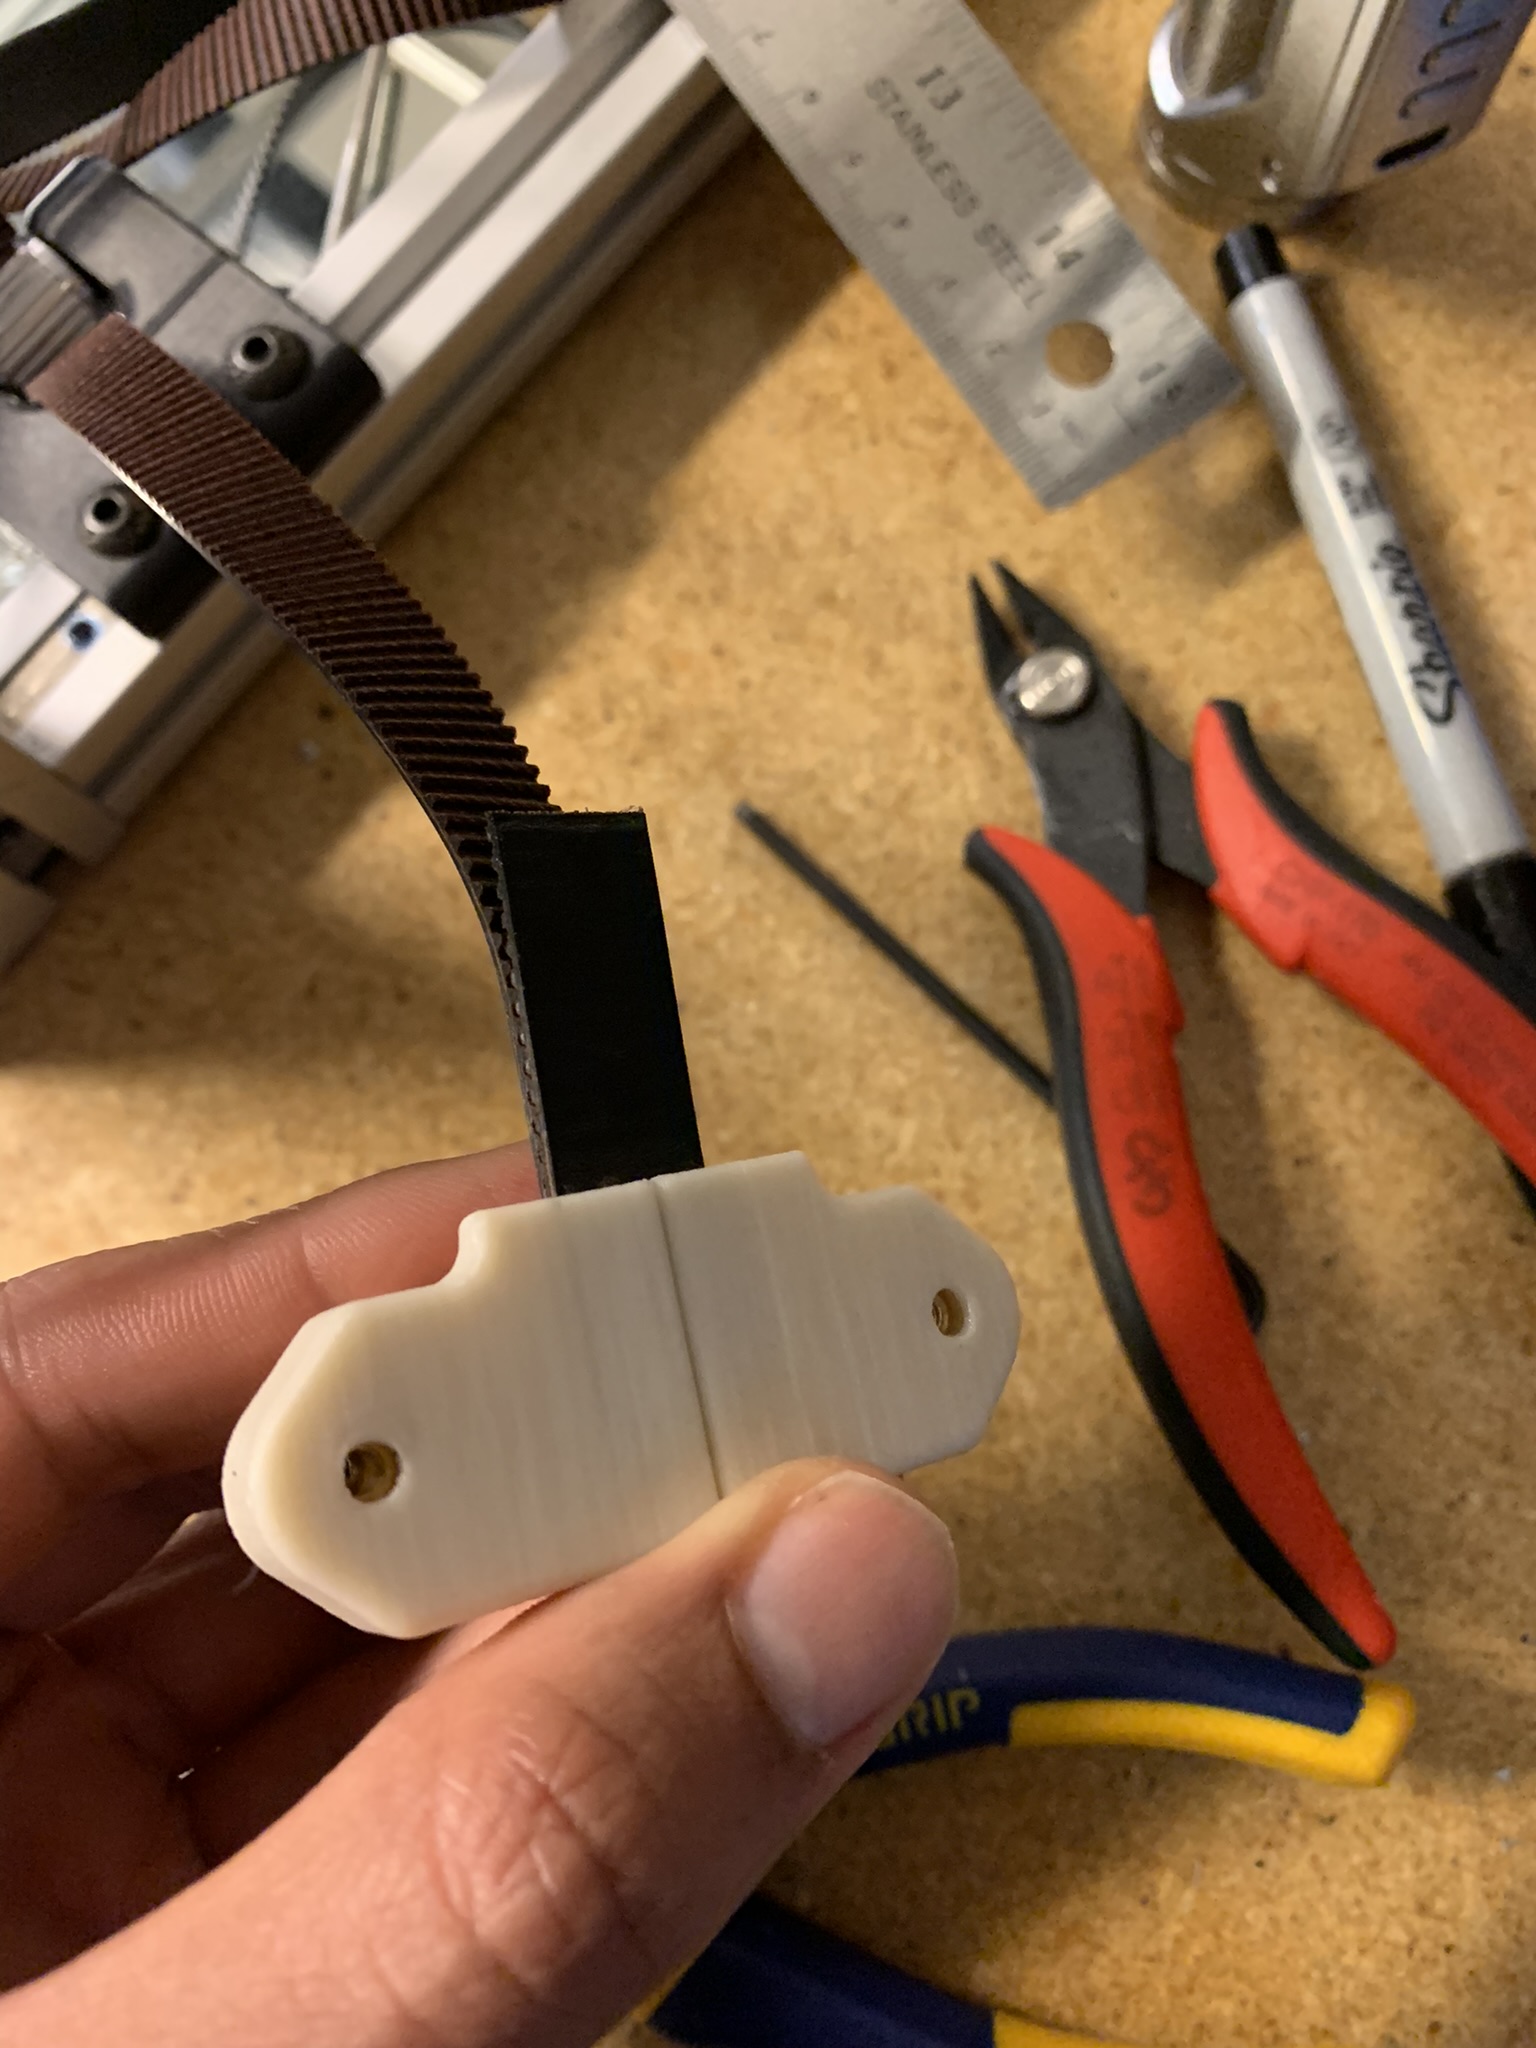
Take the loose (upper) end of the Z belt and make a tight loop. Ensure that the teeth of the belt mesh together:
Squeeze the loop into the top left part of the tensioner. The short end of the belt should be on the flat side of the “P” shape inside the printed part. It will be a very tight fit:
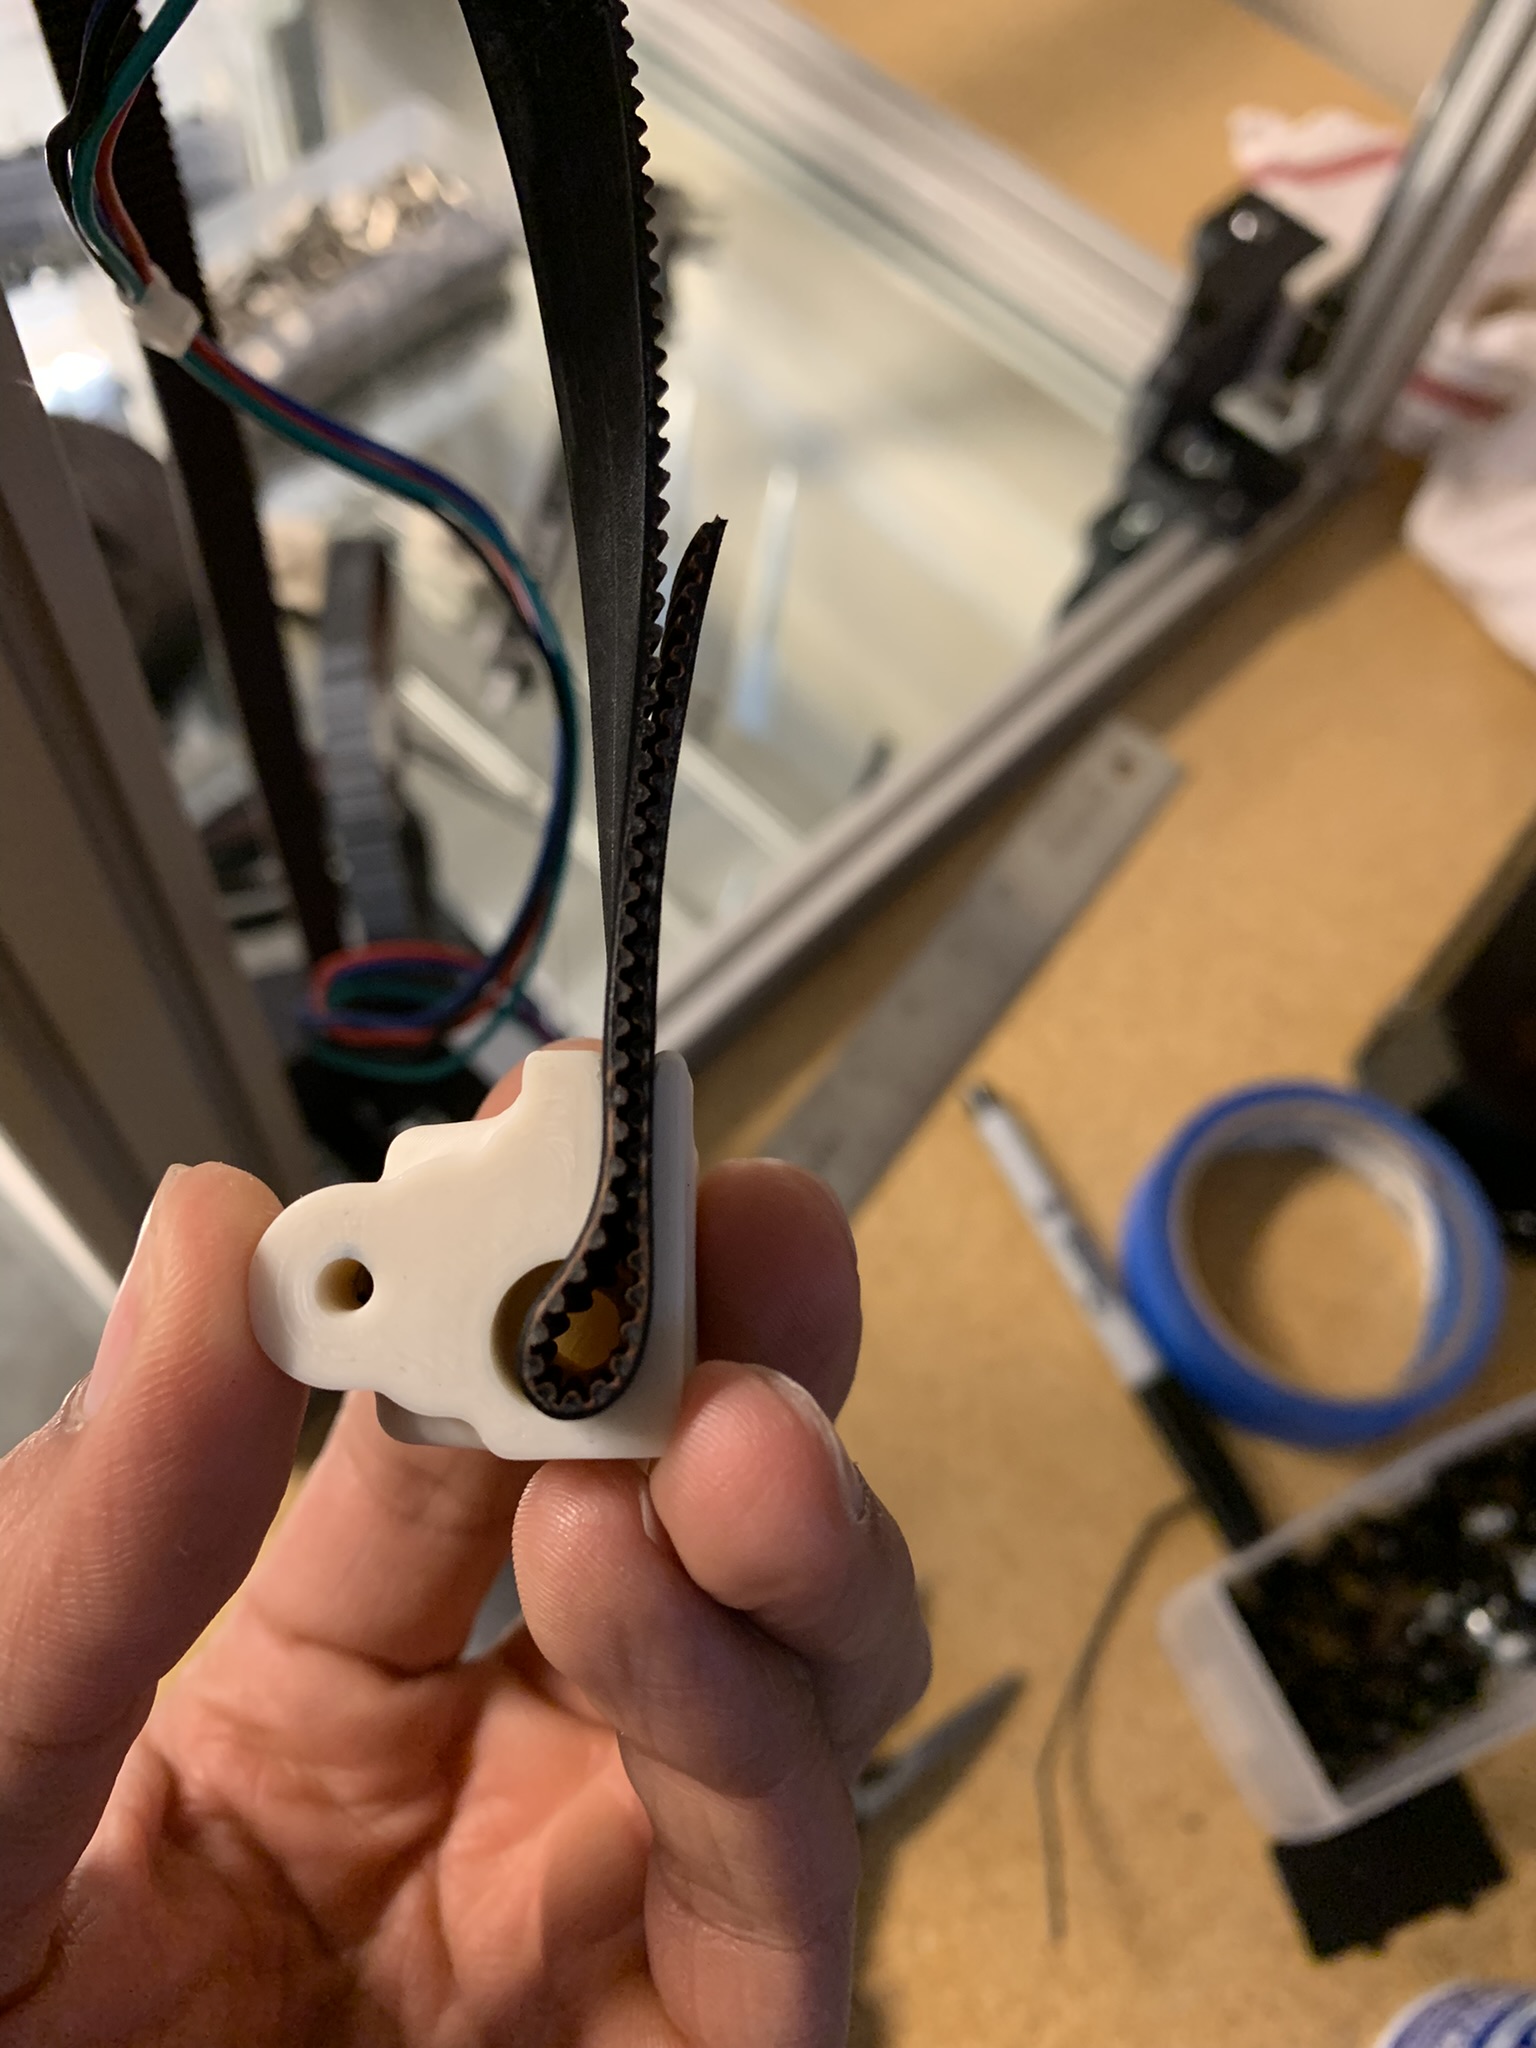
Insert the steel shaft through the belt loop and seat it inside the hole in the printed part:
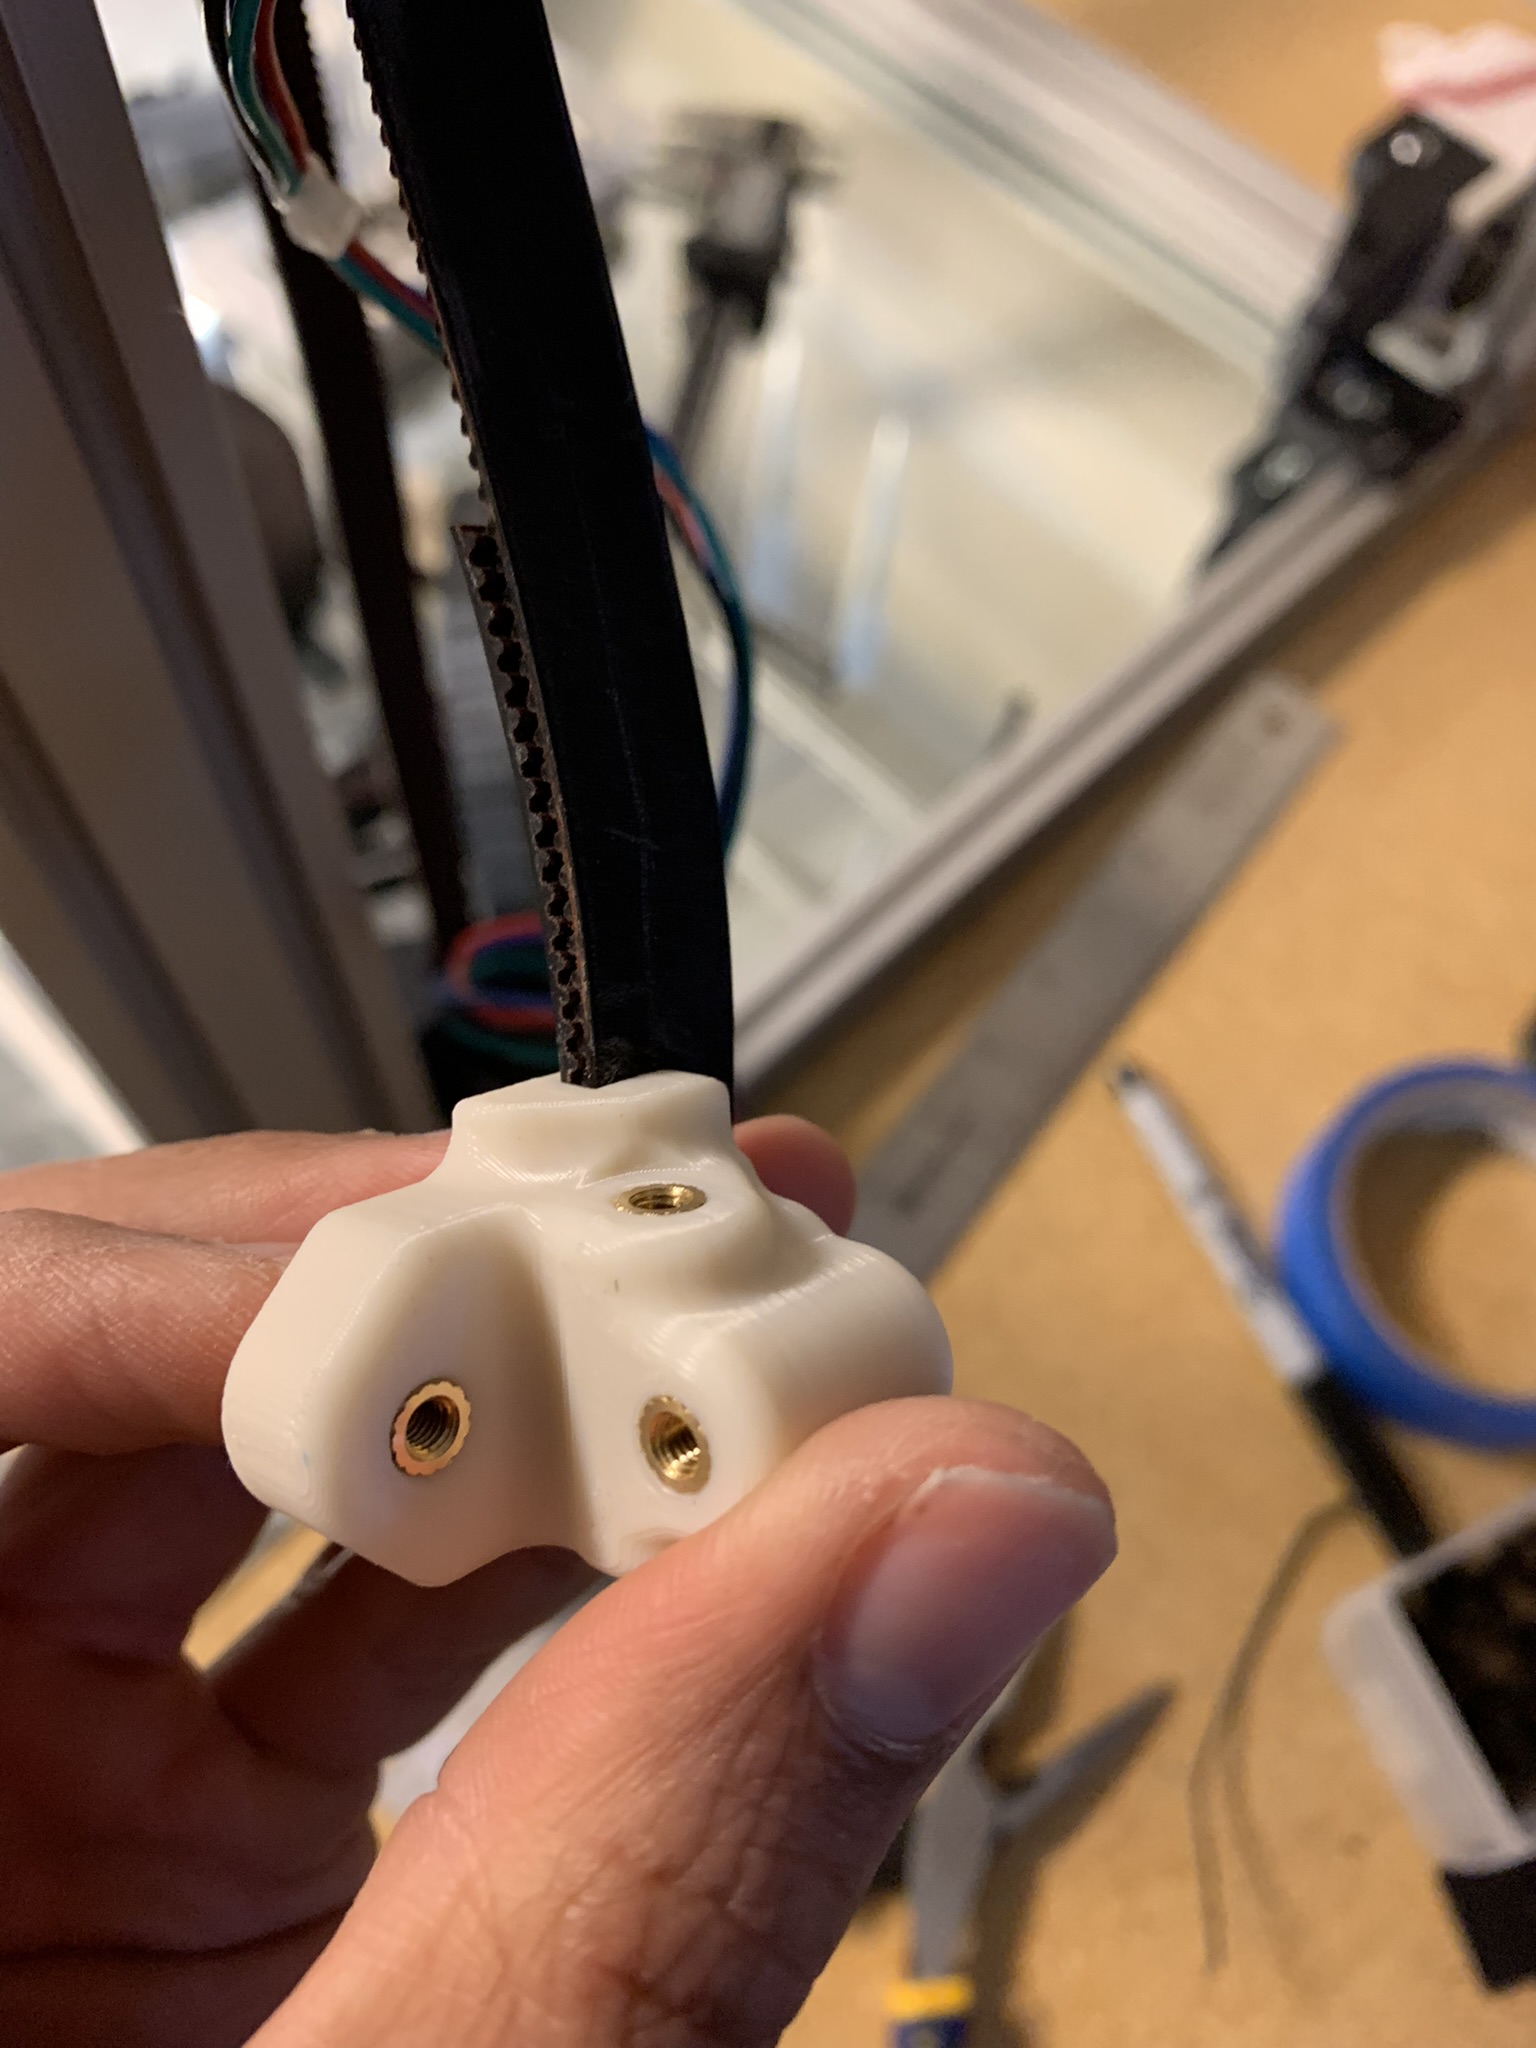
Squeeze the shaft and belt loop into the top right part of the tensioner:
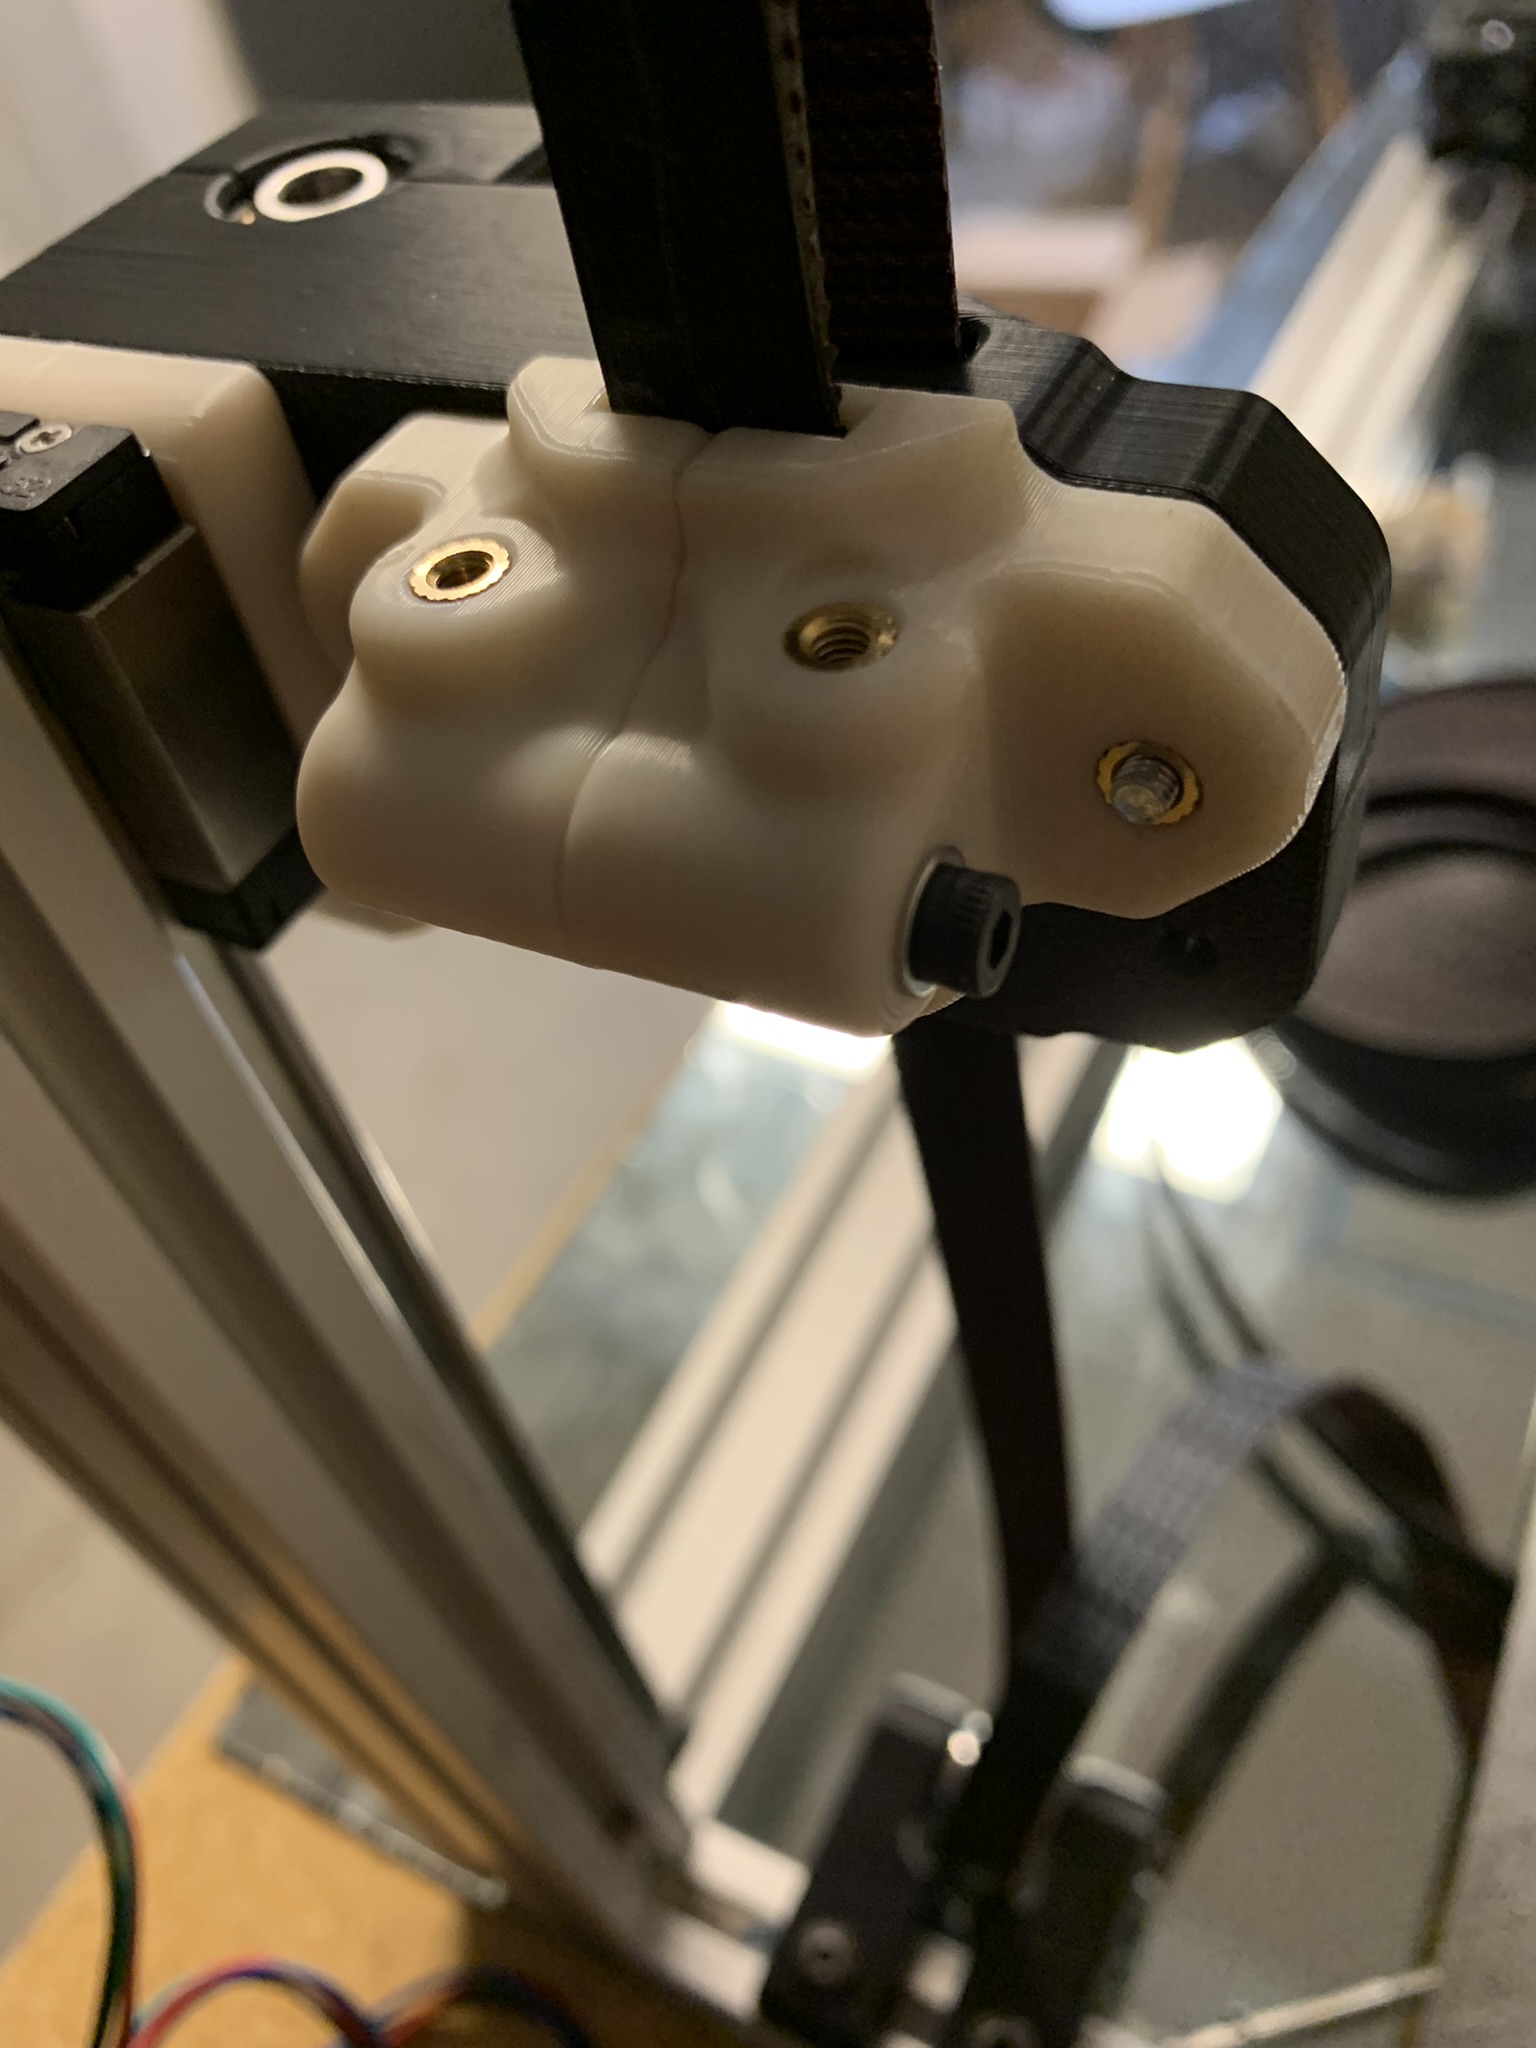
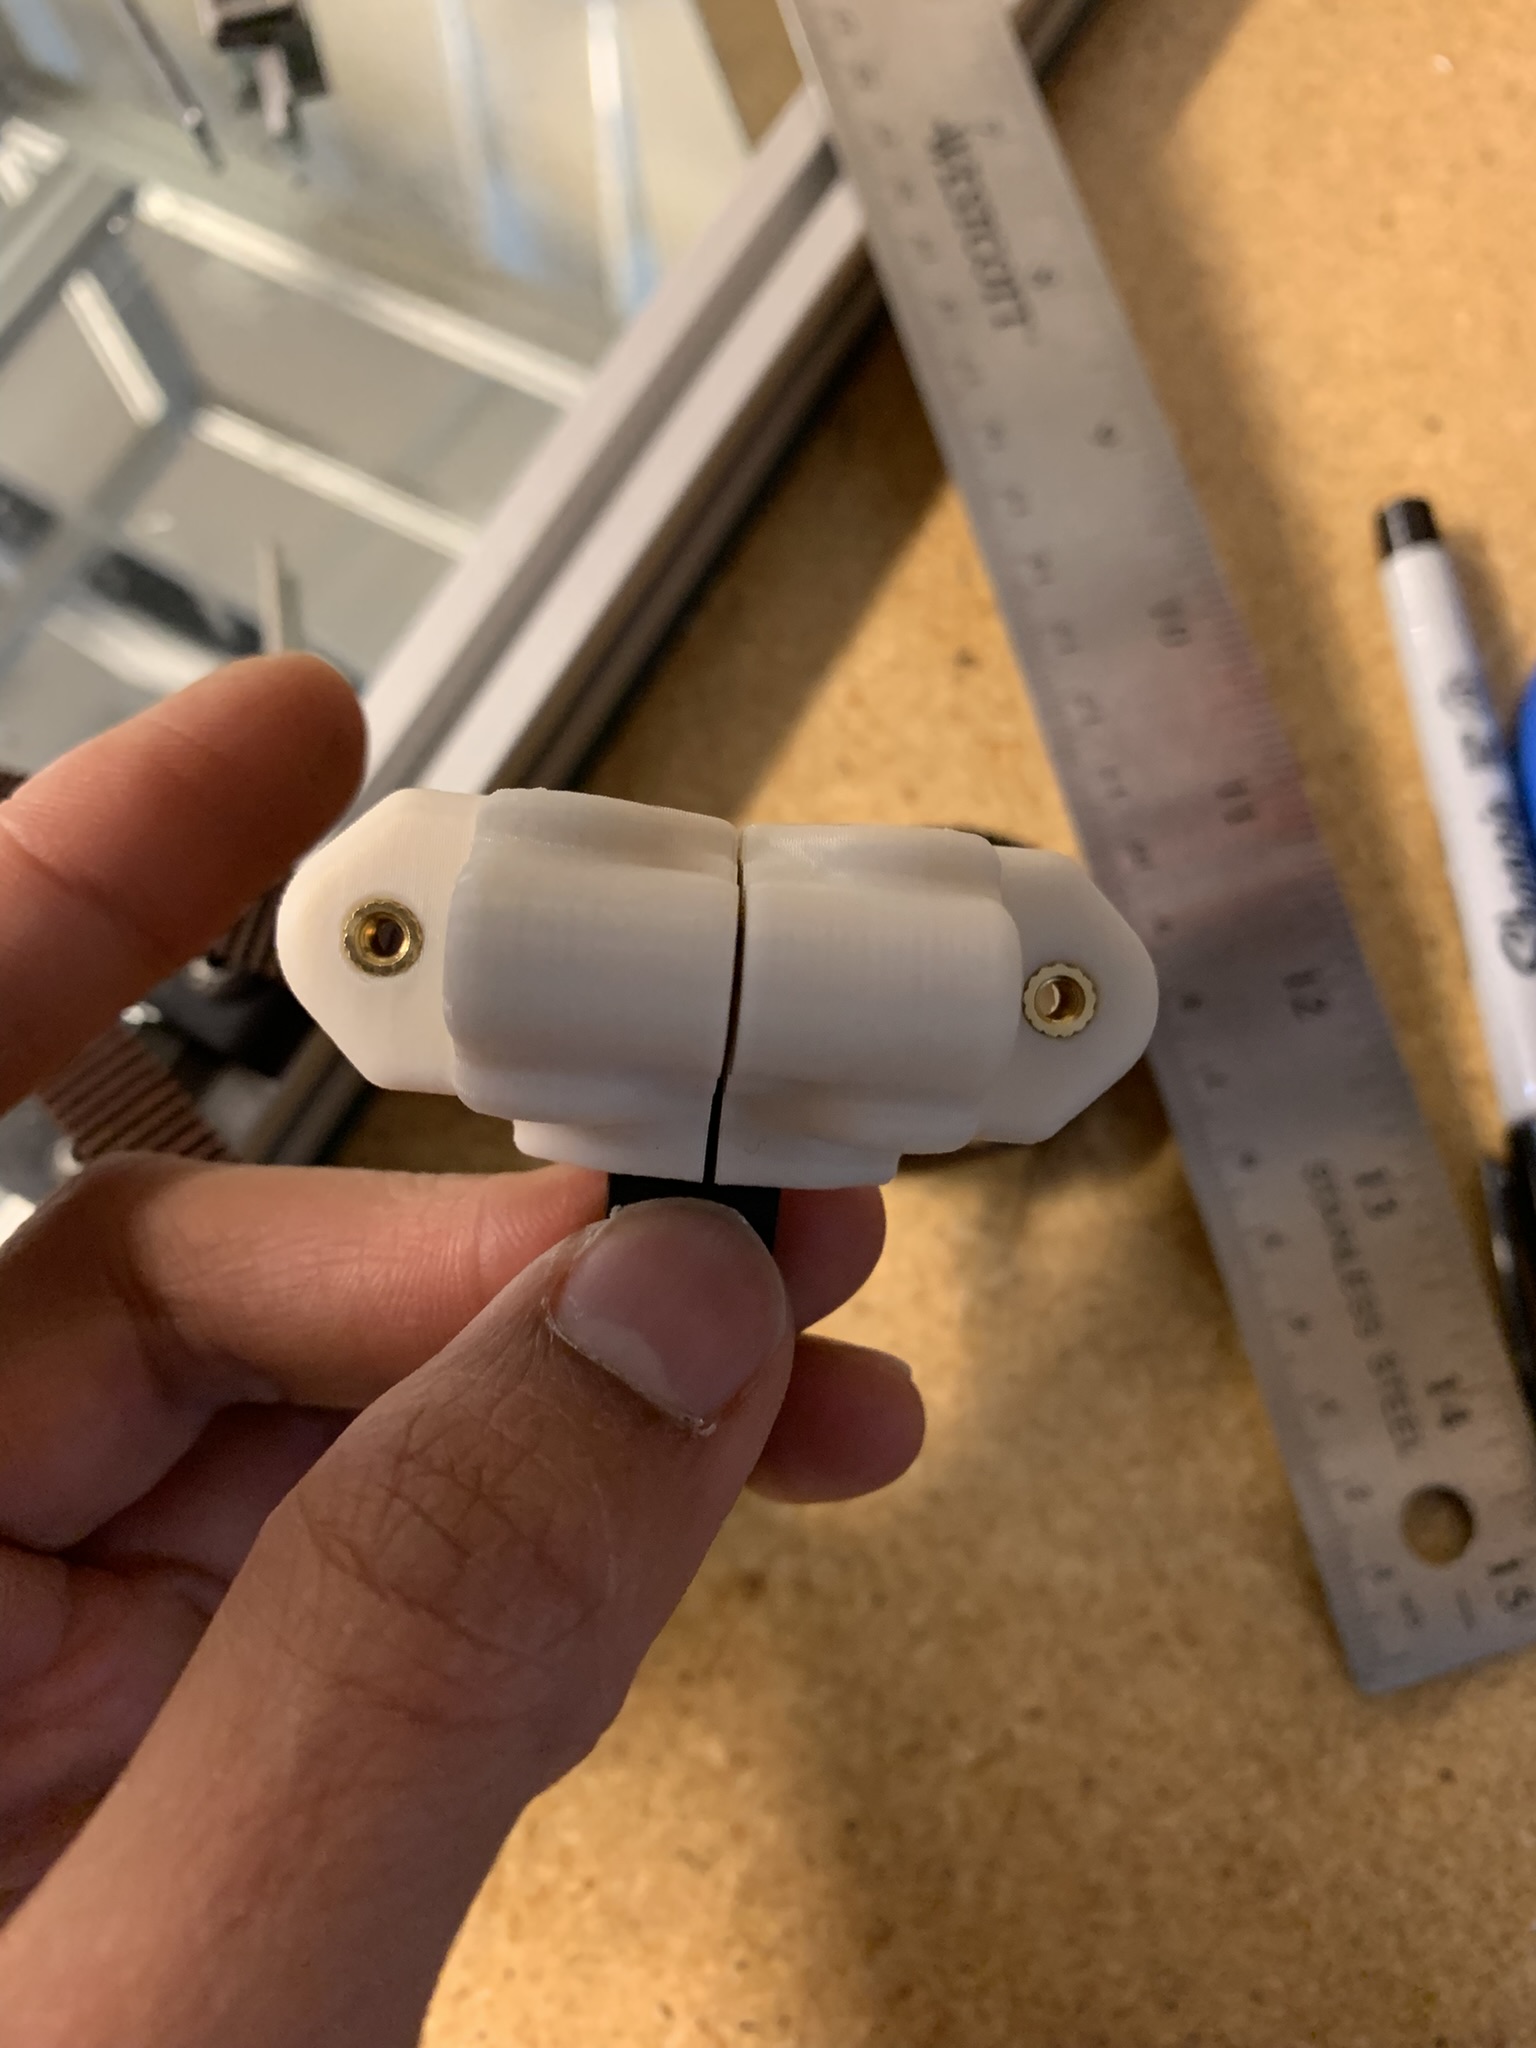
Attach the assembled top part of the tensioner to the bed lifting structure with 1x M3x35 SHCS and 1x M3x20 SHCS.

Insert 1x M3x35 bolt with an M3 washer through the two parts of the top half of the tensioner. Tighten the bolt till it’s snug.
The next part is a little tricky the first time you do it, so here’s an explanation as to why it’s done this way. According to one of the K2 developers (Trails on the Annex discord) the 12mm Z belt is thick enough that even big changes in tension only affect its frequency by 5-6 Hz. As such, the tension of Z belts can only be adjusted one belt tooth at a time. The way it’s done is by having the Z belt long enough that with minor tension, the two halves of the tensioner will be about 6mm apart. The vertical bolts connecting the top and bottom halves are then used to bring the two halves together, thereby putting tension on the belt. And by using the same length for all four Z belts and the same spacing between the two halves prior to tensioning, it is ensured that all four Z belts have roughly the same tension.
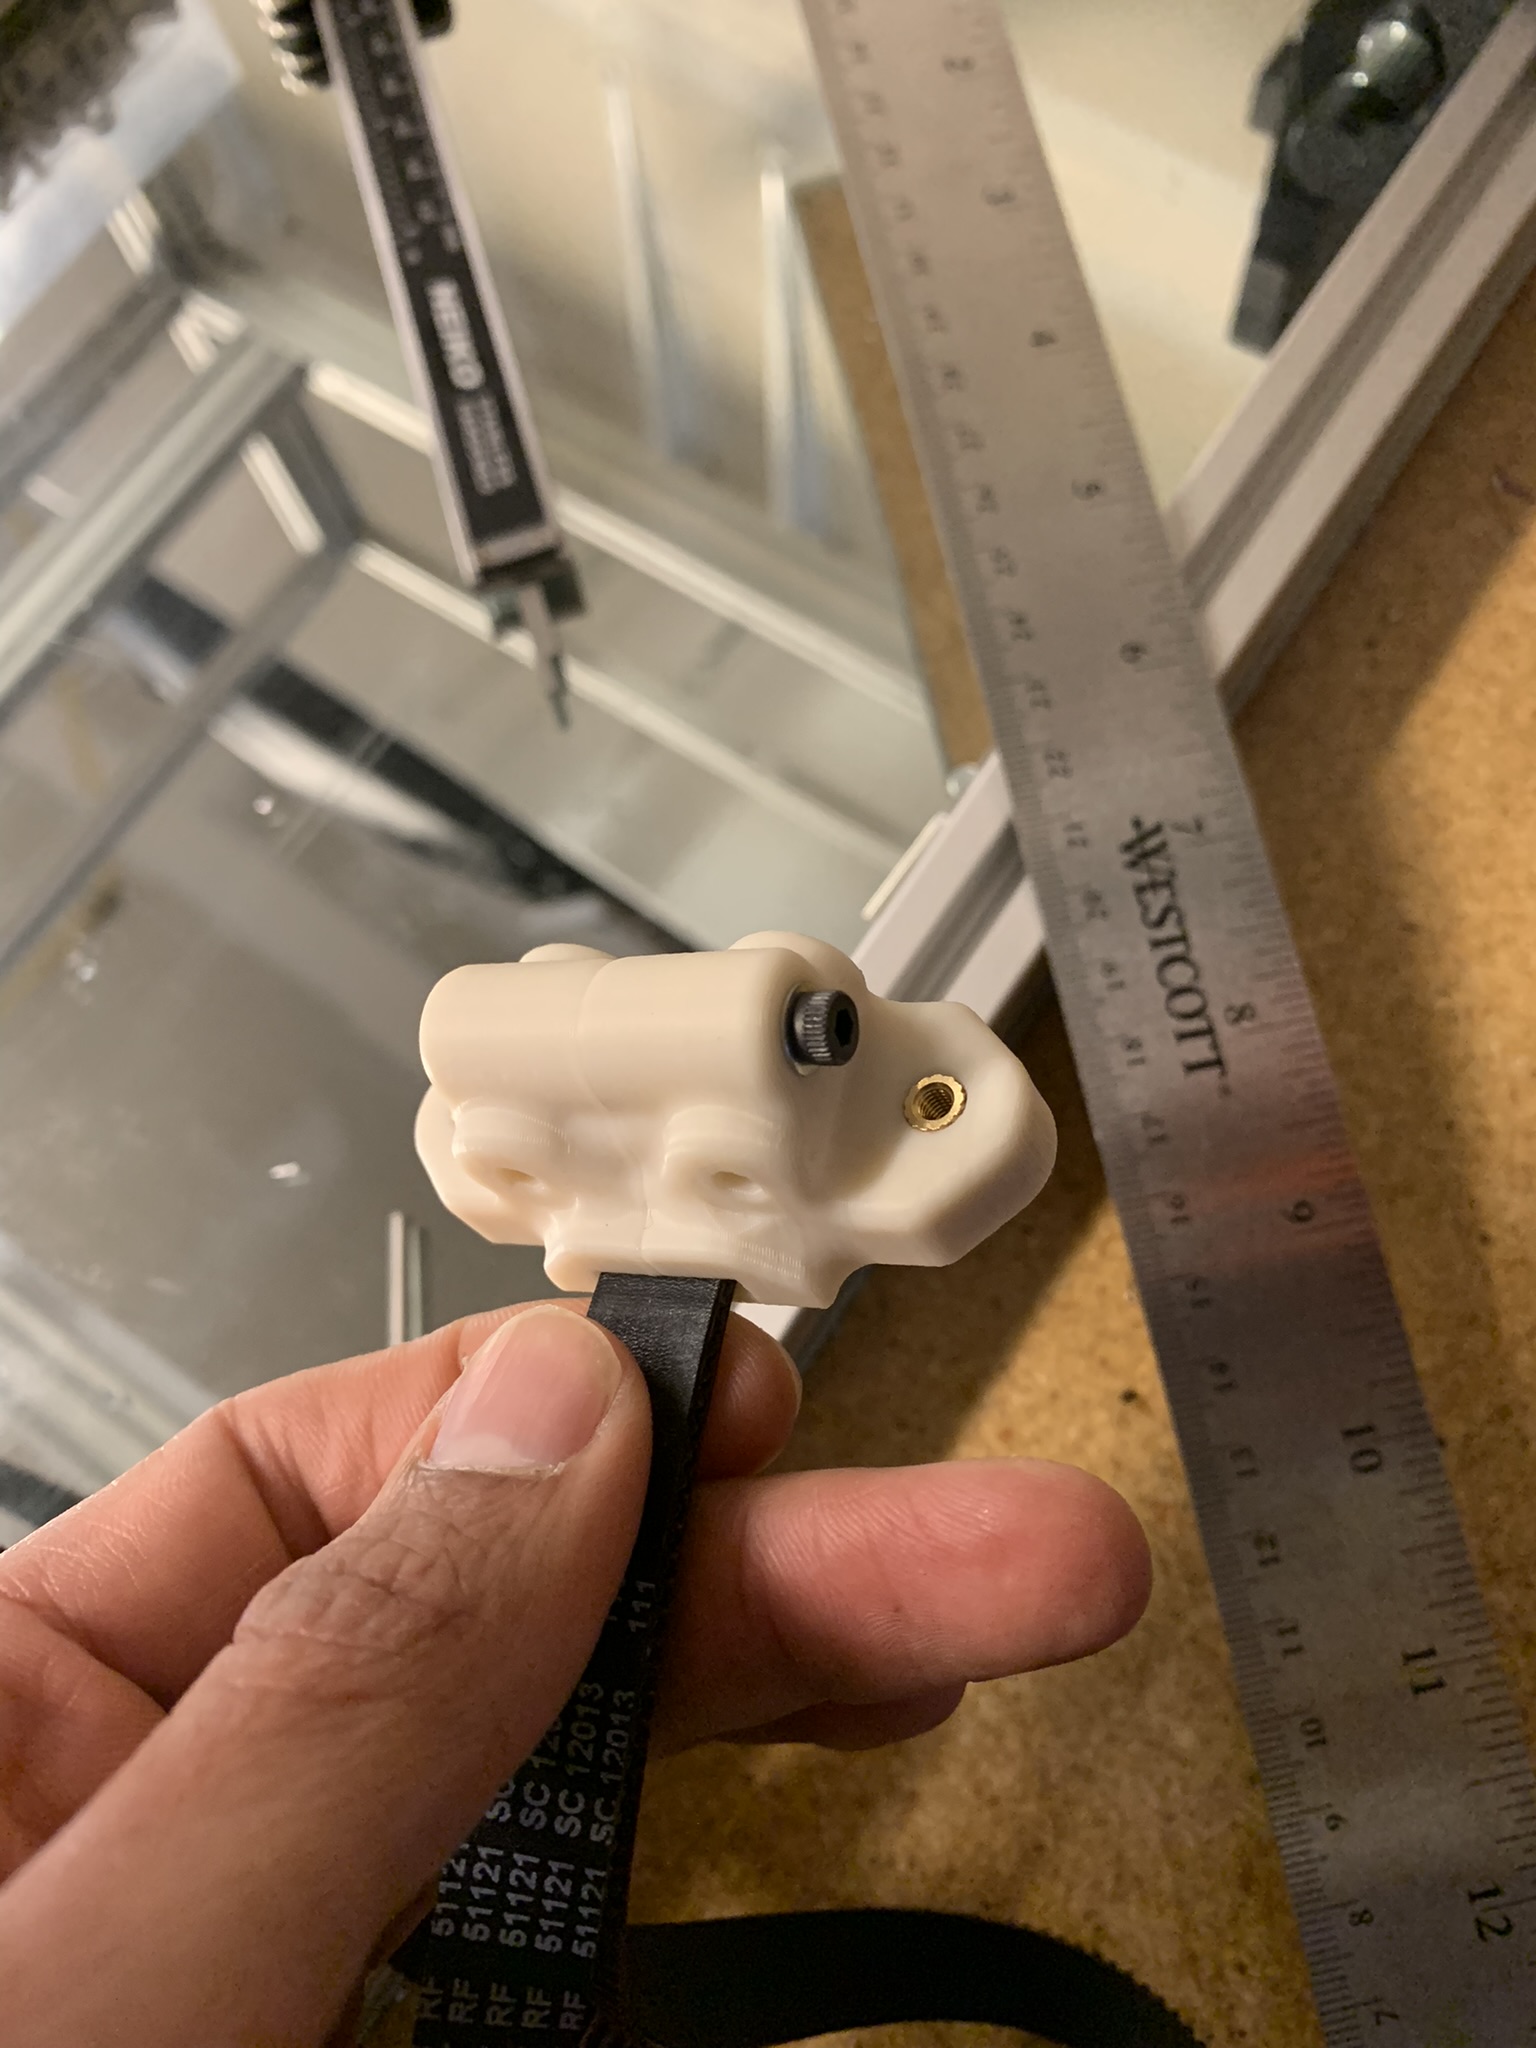
With that out of the way, let’s assemble the bottom half of the tensioner, identical to how we assembled the top. Take the bottom left part:
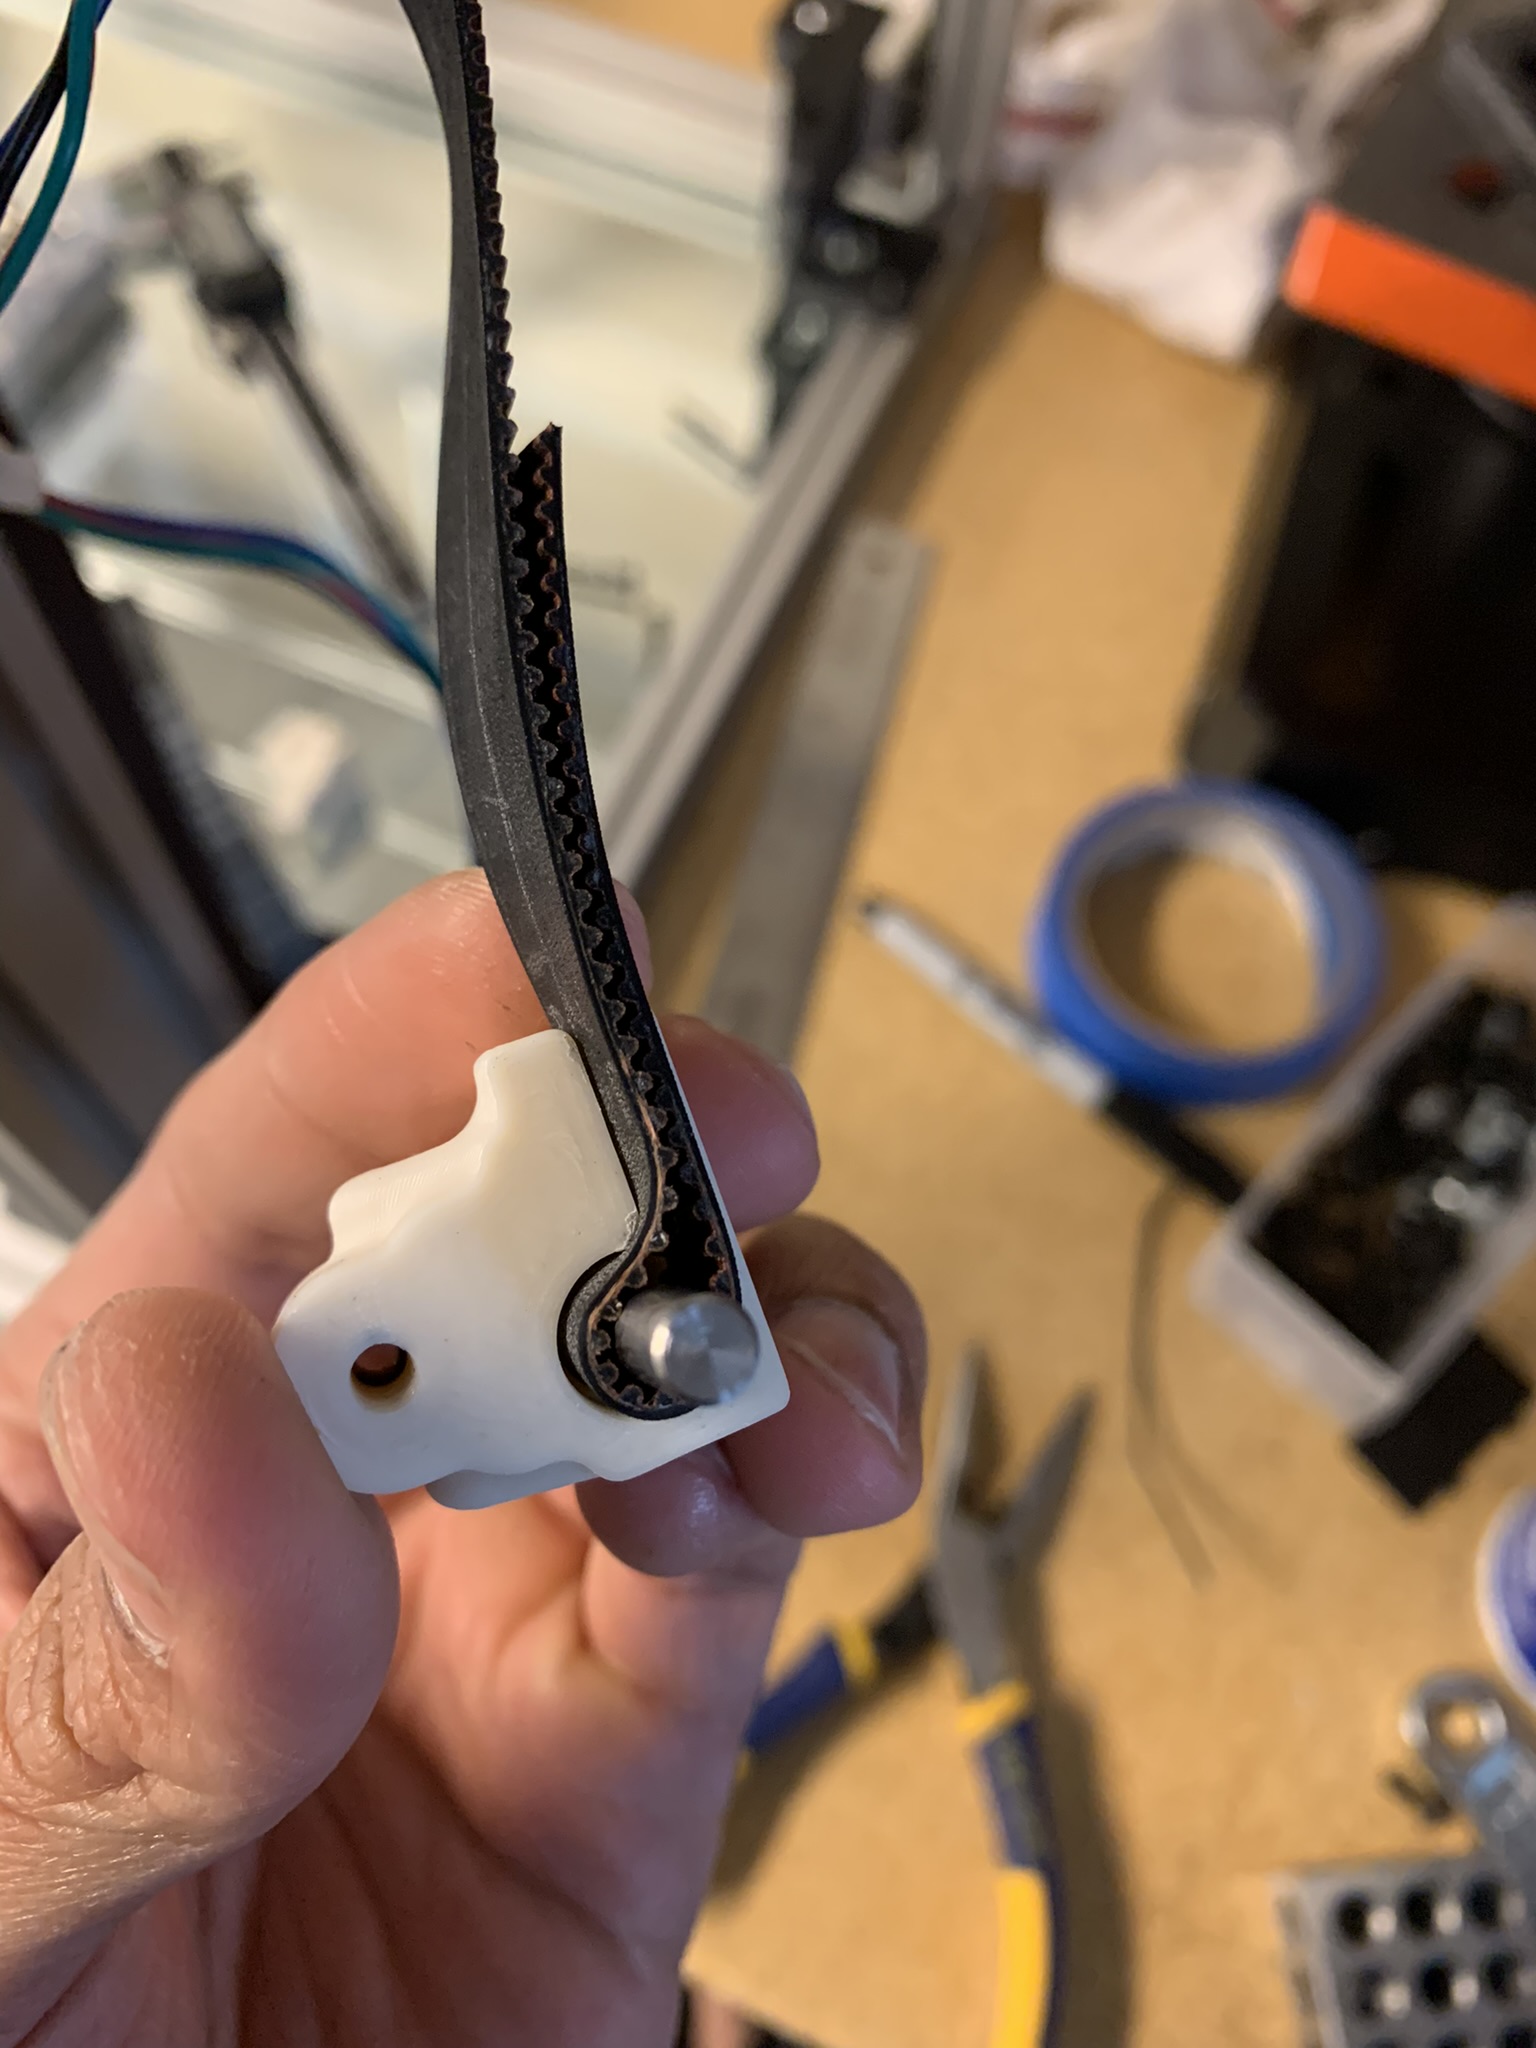
Take enough belt length that the two halves will be close but not touching. We will be adjusting this in a bit, so the exact length doesn’t matter, just pick a length that looks approximately right at this juncture. Make a loop and insert it into the part such that the part of the belt coming from your Z idler is on the curved part of the mirrored “P” shape inside the printed part. Insert the steel shaft into the loop and the hole in the part:
Squeeze the bottom right part onto the belt and the shaft:
Insert 1x M3x35 bolt with an M3 washer through the two parts of the bottom half of the tensioner.
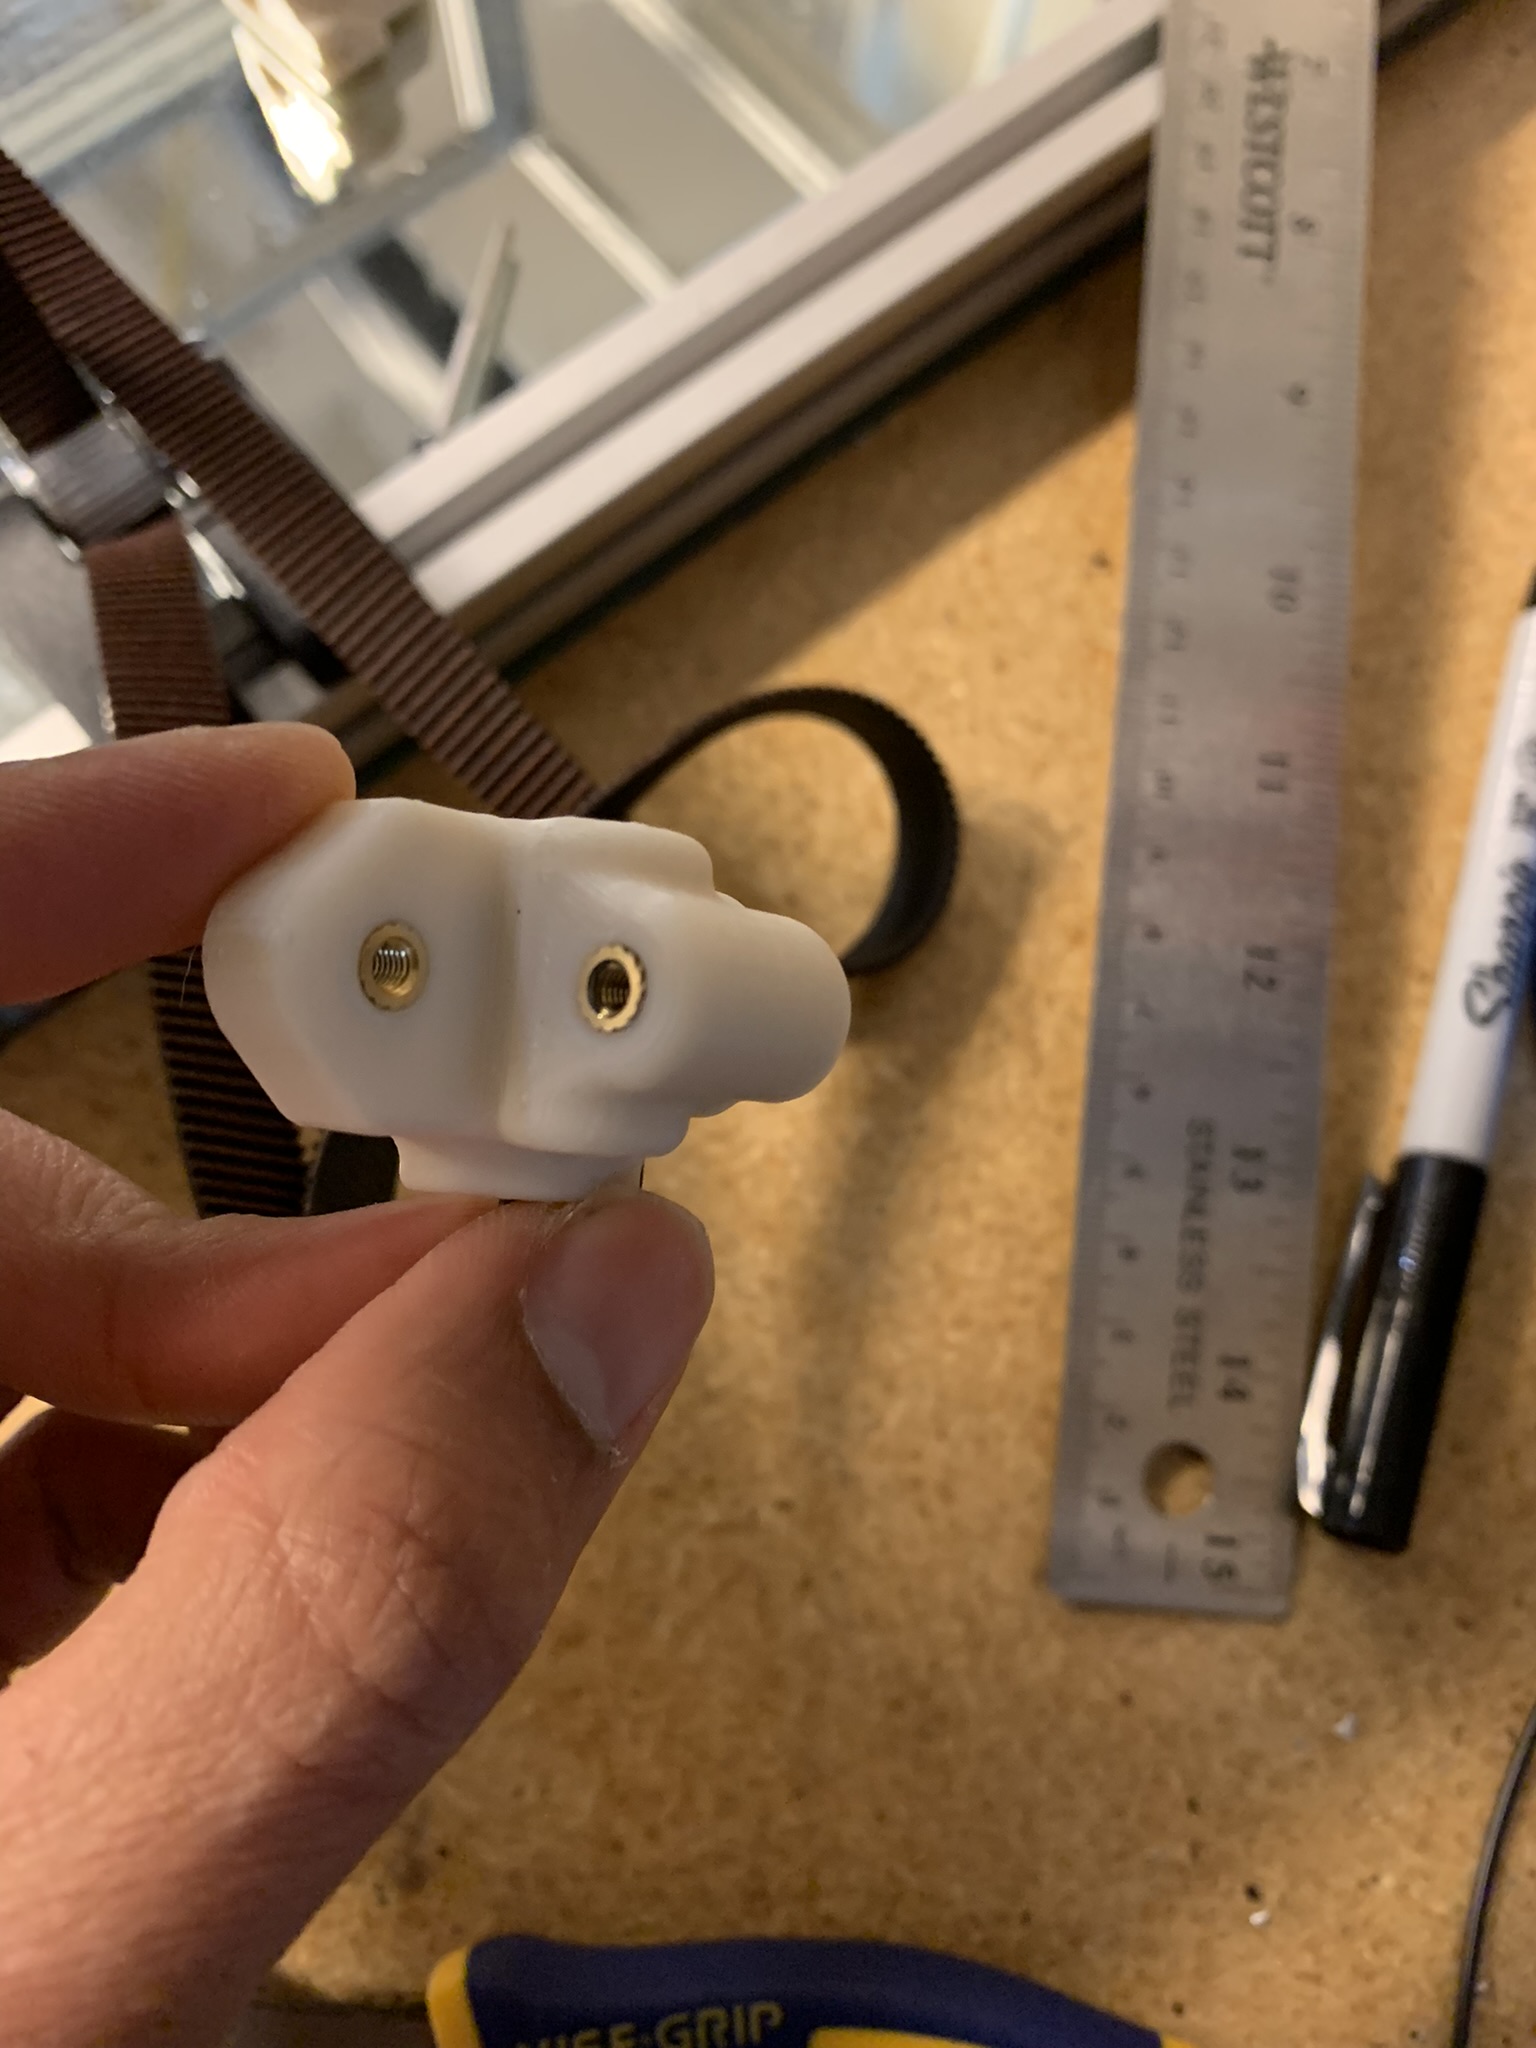
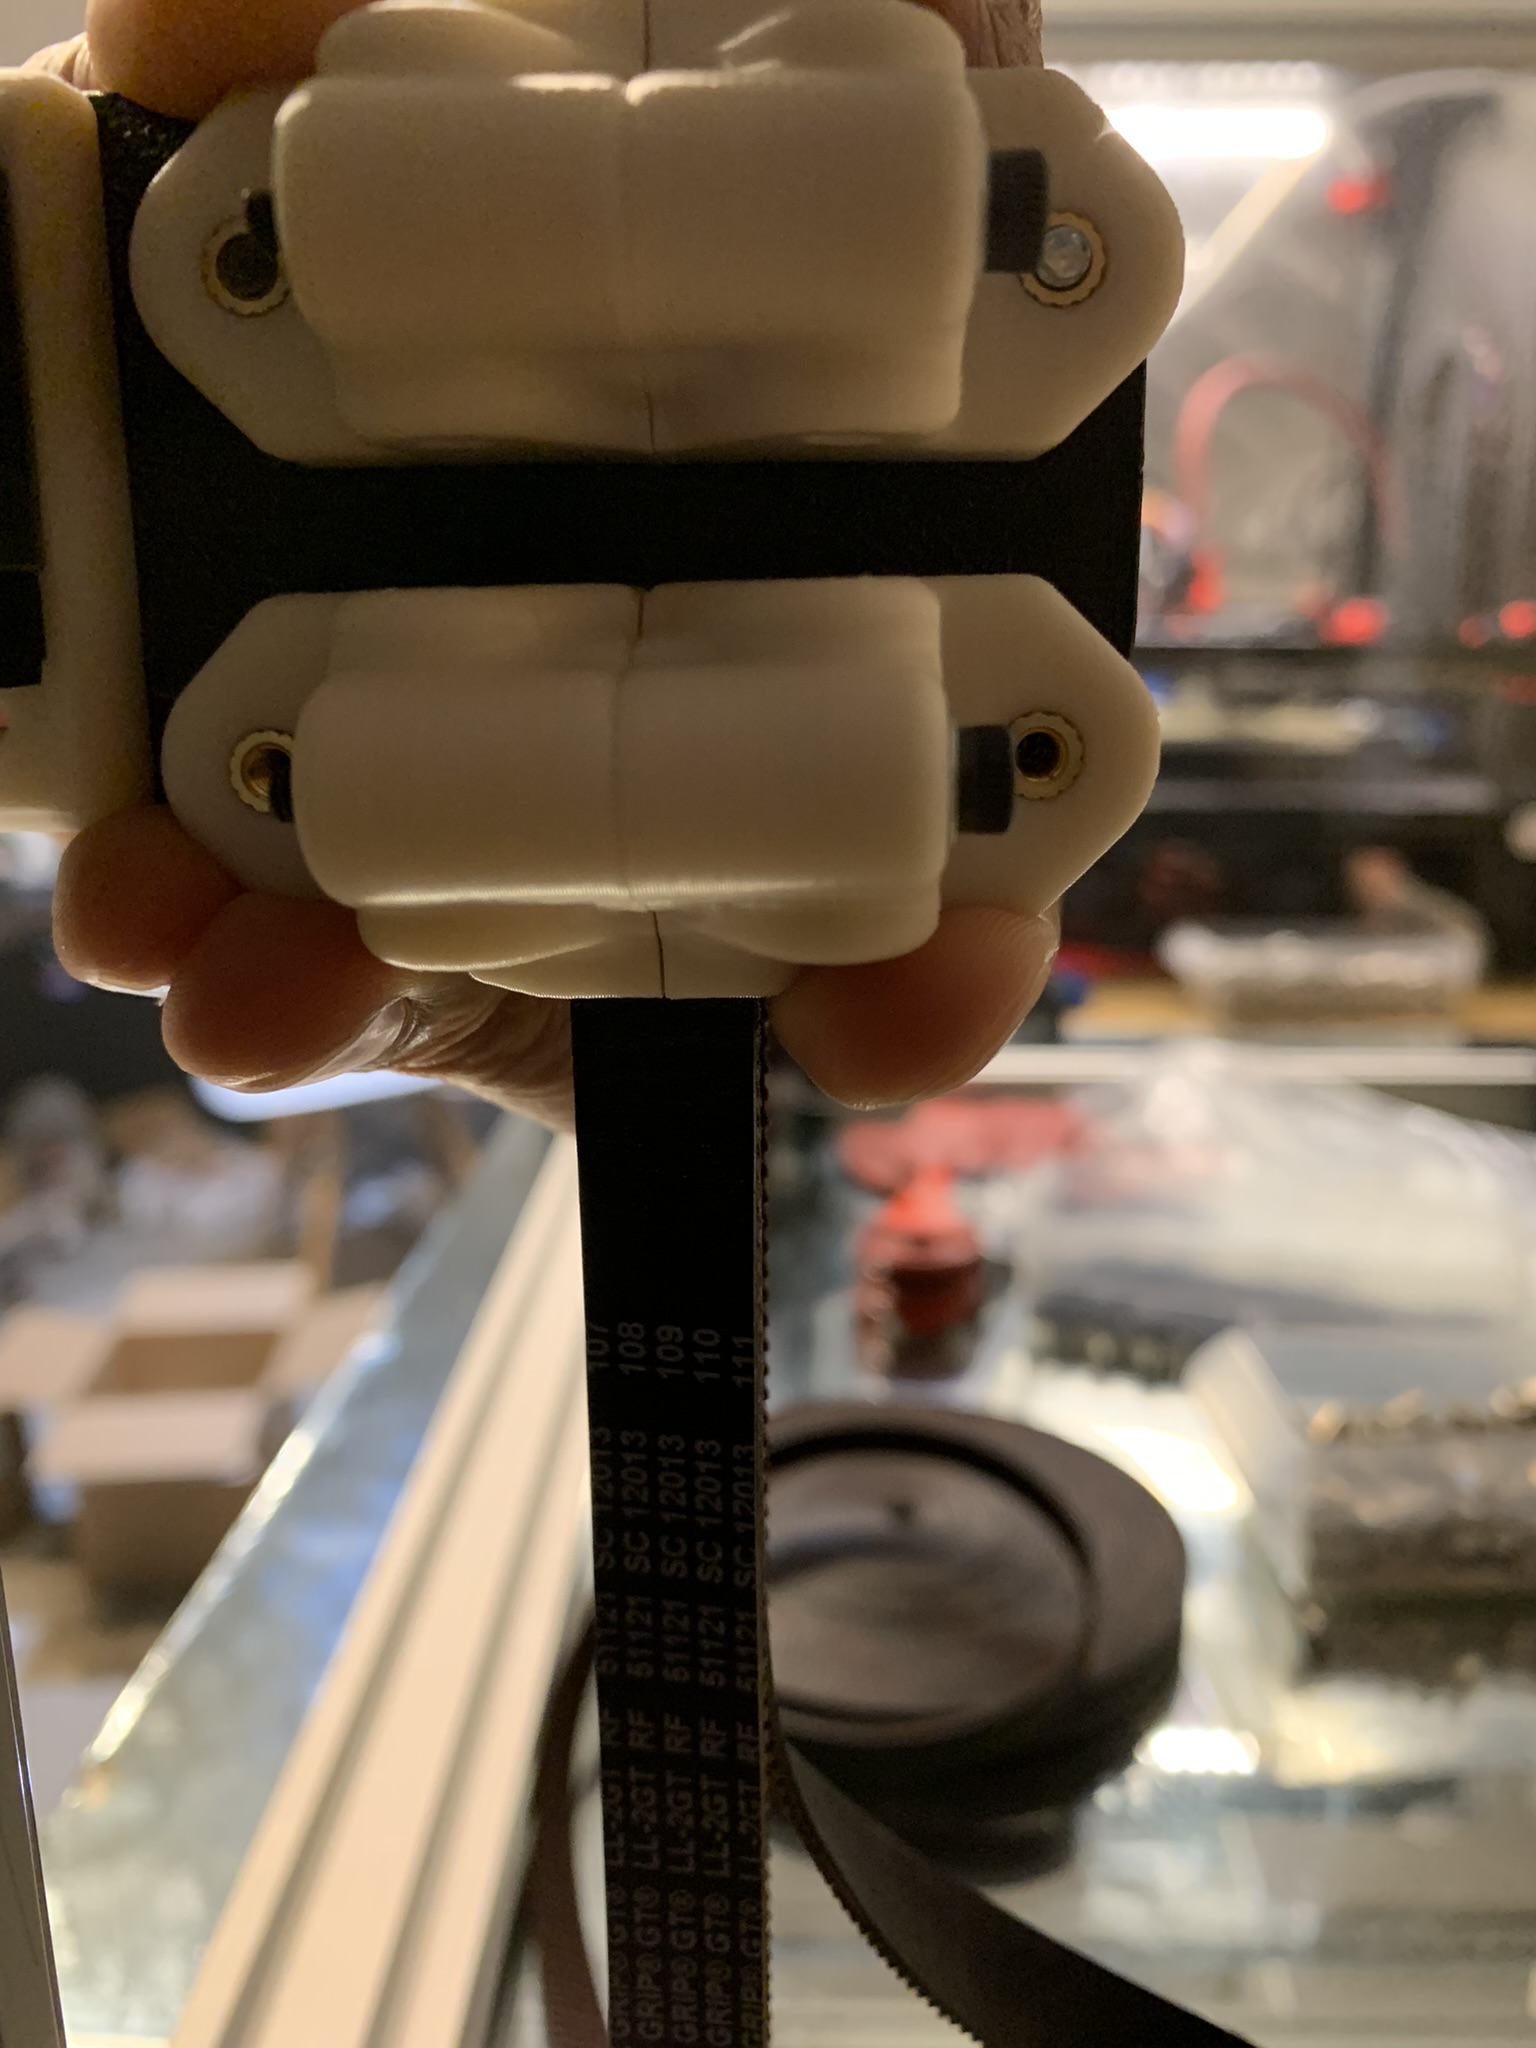
Now, hold the bottom part in place on the lifting structure and pull it upwards gently so that the belt has light tension. There is no need to yank on it, just a little bit of tension. Use a ruler to measure the approximate distance between the top and bottom half. As explained earlier, we want them to be 6mm apart. If yours are closer or farther, disassemble the bottom half, move the loop by sliding the belt up or down and try again.
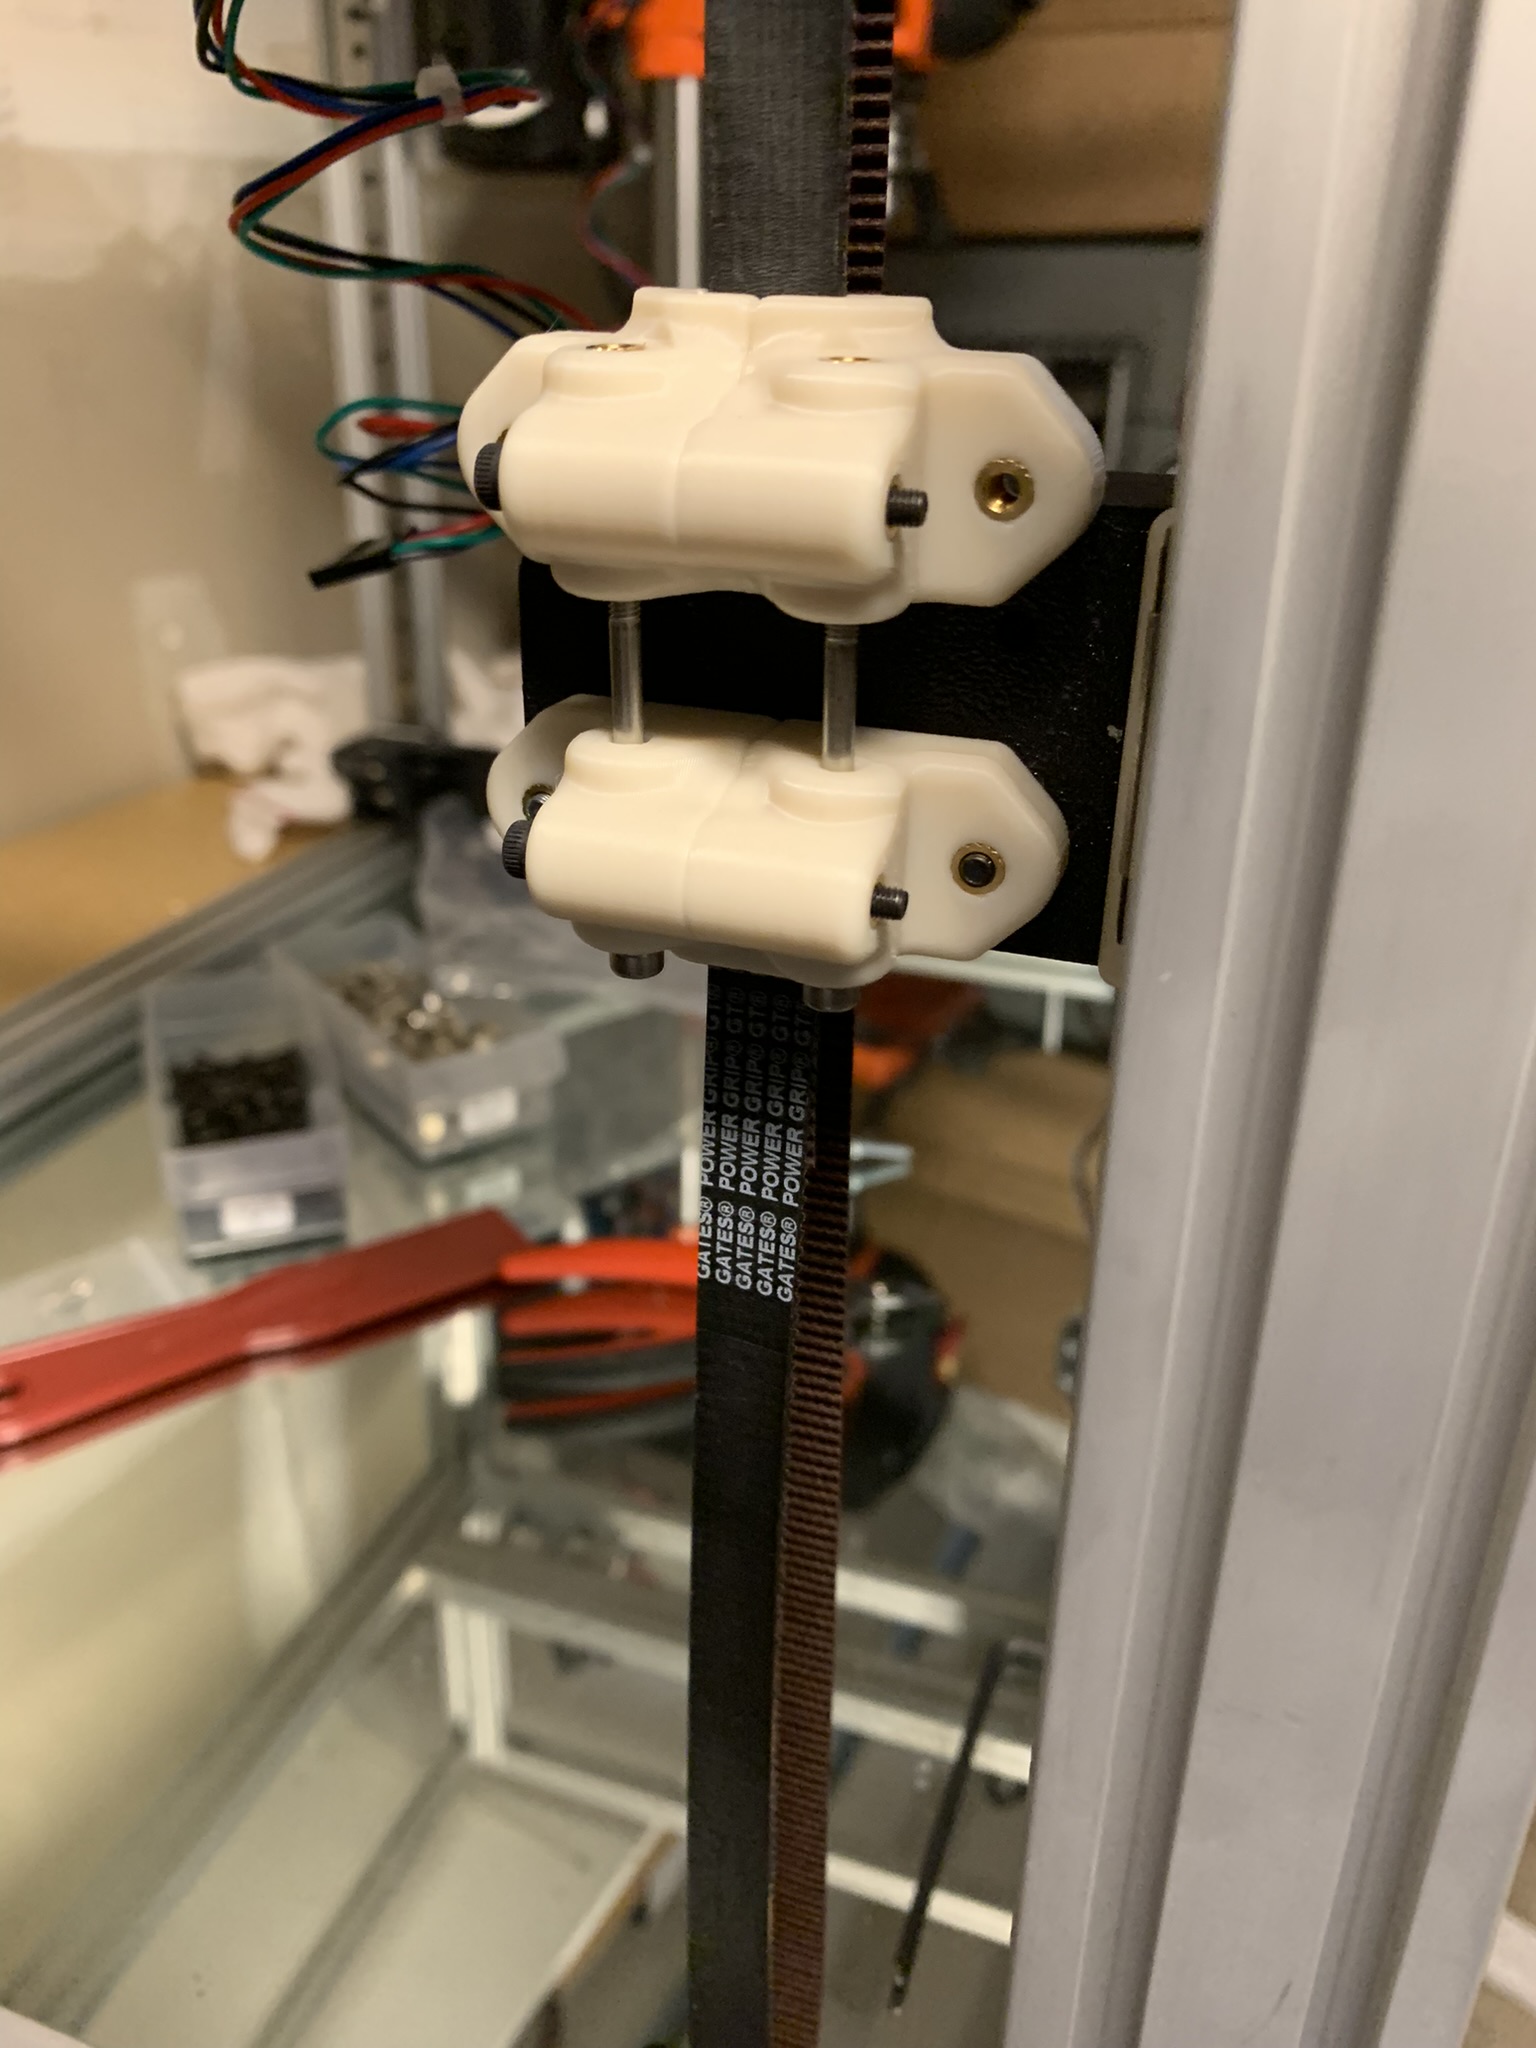
At the end, it should look like this:
Now, leave a generous amount of belt sticking out of the bottom half of the tensioner, and snip the rest. I left about 16 teeth on mine. Don’t be stingy here, it’s better to have belts that are too long than belts that are too short. You can shorten a long belt later if needed, but you can’t make a short belt longer.
Take note of how many teeth are sticking out of the bottom and top halves of the tensioner (they’ll most likely be different, and that’s okay). Disassemble the tensioner. Pull out the belt, and cut three more belts of the same length from your roll. The length needs to be the same to the number of teeth, I do this by laying a cut belt against an unrolled length of belt with the teeth meshing, and running both through my fingers till I get to the end of the cut belt. I then snip the unrolled length at the same height so that it has the same number of teeth as the already-cut length.
I cannot stress this enough so I’m going to repeat it with emphasis - cut three more belts with the same number of teeth as the first
Follow the above procedure for all four belts. It’s easiest if you adjust your loops so that all four tensioners have the same length of belt (to the tooth) sticking out of their top halves and the same for their bottom halves (that’s why we wrote those numbers down before disassembling the first tensioner). This time around, use loctite on all bolts mentioned so far. We didn’t use any the first time because we were planning on disassembling that tensioner.
Finally, use 2x M3x50 bolts with M3 washers to loosely connect the top and bottom halves of each tensioner. Screw the bolts in only till they’re gripping the thread of the heatset insert. Don’t use loctite at this stage, we’ll use loctite and tighten these later.
We’ll be tightening the tensioners after we’ve attached the bed extrusions and roughly leveled the bed. Once tensioned, it’s impossible to move Z by hand, and having a roughly leveled bed will make first printer bootup a LOT easier. I imagine it will also make installing the bed extrusions easier, but we’ll find out together in the next part of the build log.